Bakfiets cargo bike with a TSDZ2 mid-motor
, updated (see "The Ride"), (see "The chainguard")
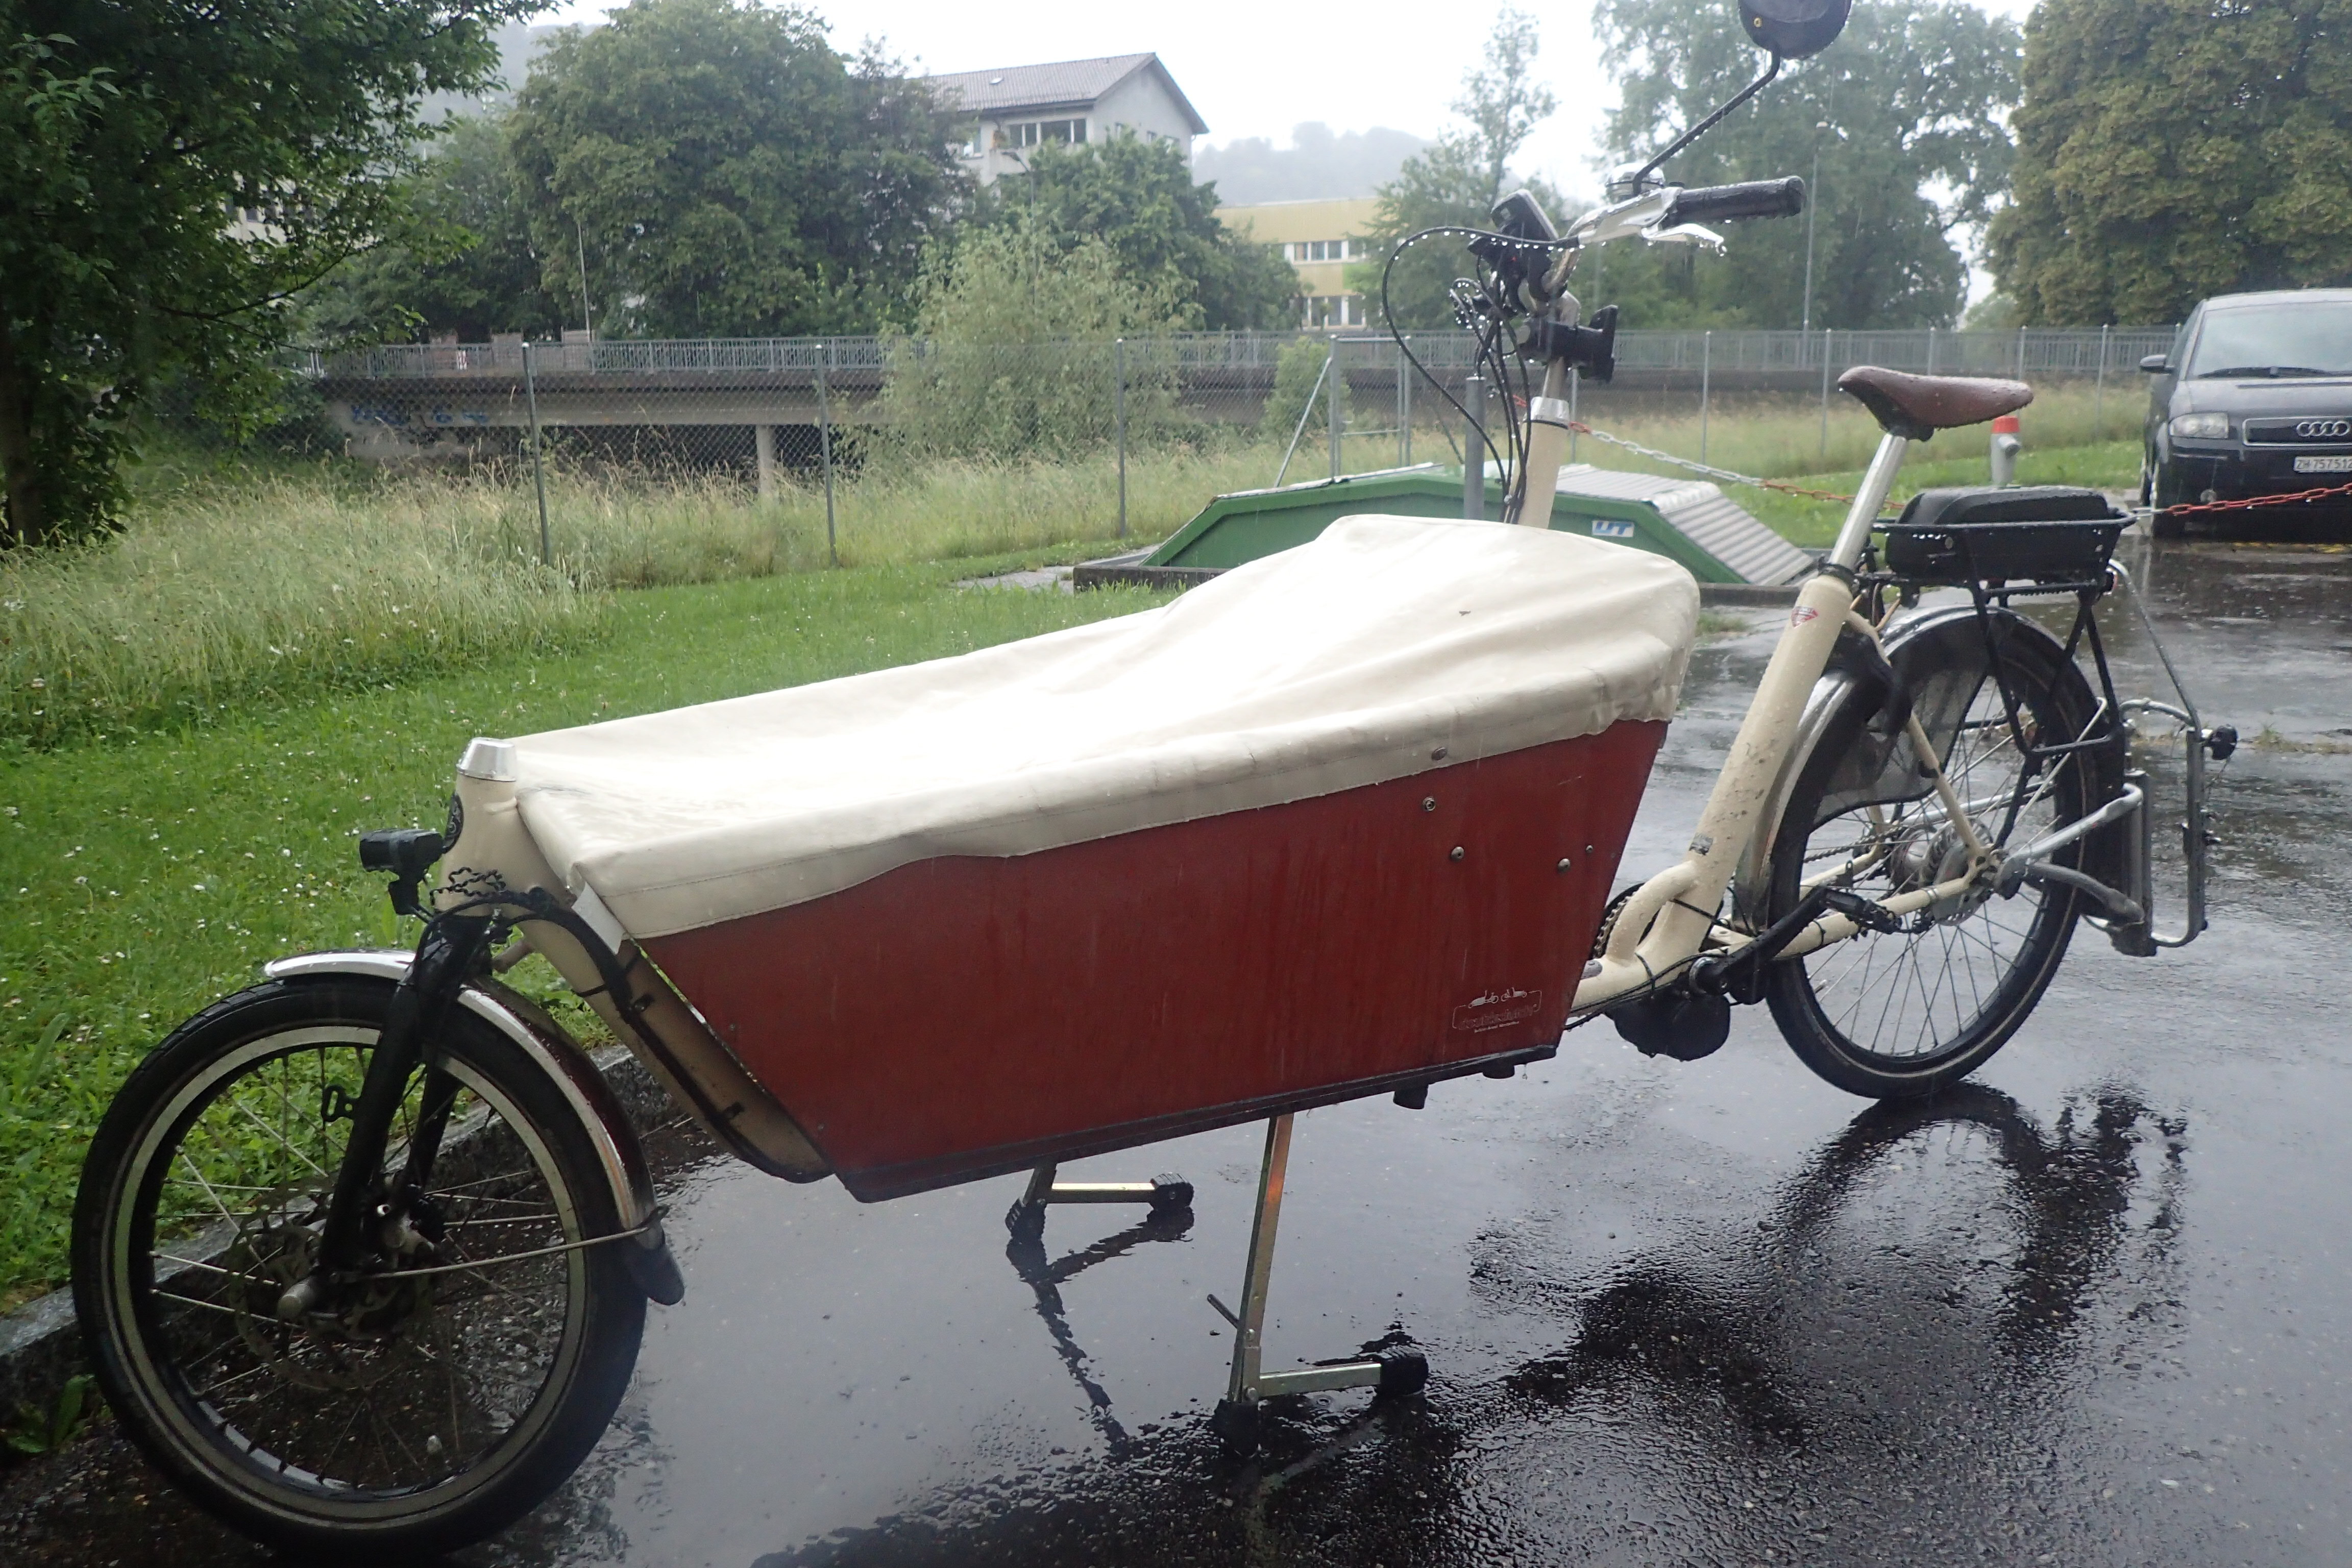 The Bakfiets with the shiny new TSDZ2 mid motor (the black thing below the bottom bracket)
TL;DR the TSDZ2 mid-motor can be installed in the Bakfiets Cargobike Cruiser, however, a fat washer (inner diameter min 33.3mm, outer max 46mm, thickness 5.5mm to 6.5mm) is needed to make sufficient clearance on the chainwheel side. Additionally small M5 washers are needed for the other side. It rides well.
Note that apparently there was a slight update to the TSDZ2 in 2020, but this should probably still work. Update: According to blog-reader Martin, the new version needs a washer of only about 2mm thickness. Otherwise, these instructions still apply.
History
We've had our Bakfiets cargo bike since 2014 and are very happily hauling kids, Christmas trees, bags of concrete, combinations thereof, and the likes. I really love how the bike rides, even when the total weight reaches 200kg! At the time when we bought it, an electric version was newly introduced with a front wheel hub motor by Azure. Our bike is identical to the Cargobike Cruiser Long as still sold today but with a front-hub motor (and we opted for front hydraulic brakes, a blessing). This motor worked really well, in particular on the flats. I would definitely recommend a motor with a heavy cargo bike, of course for the uphills, but even if living in the plains, as it makes accelerating and thus fitting & merging into traffic much easier.
About 2 years ago we moved to a new place up a short hill. Hub motors are know to have limitations on those settings as they are low torque. Bottom bracket motors (aka mid-motors) are much better as they can use the bike gears. After much research I ordered a Tongsheng TSDZ2 moter kit (500W/48V) from http://www.pswpower.com (but there are many other sellers). Note that at 500W it is still a pedelec (i.e. not needing a number-plate) in Switzerland, as long as the assist cuts out at 25kmh (in the EU the limit is 250W).
Cool things about this motor:
- output is torque regulated, similar to Bosch and other motors
- there is an active open-source community around modifying the firmware
- it can be opened up and repaired
What the internet did not tell me was whether it would fit the Bakfiets (luckily, now the internet knows…).
Unfortunately, it took me 1.5 years to get around to installing the conversion kit. Which I did last weekend, mostly following the manual. All in all it took me about two full days, but that included de-installing the old motor battery and cables and routing the new cables nicely; and customising the washer. Yes, the washer was also one of the reasons I did not install the kit upon receiving it, as I first needed to source one.
As a first step, I tested the motor uninstalled. It worked fine using the thumb throttle but did not react to any rotation on the cranks. I think this was because I did not get enough torque on the cranks without resistance from an attached bike.
A space-issue
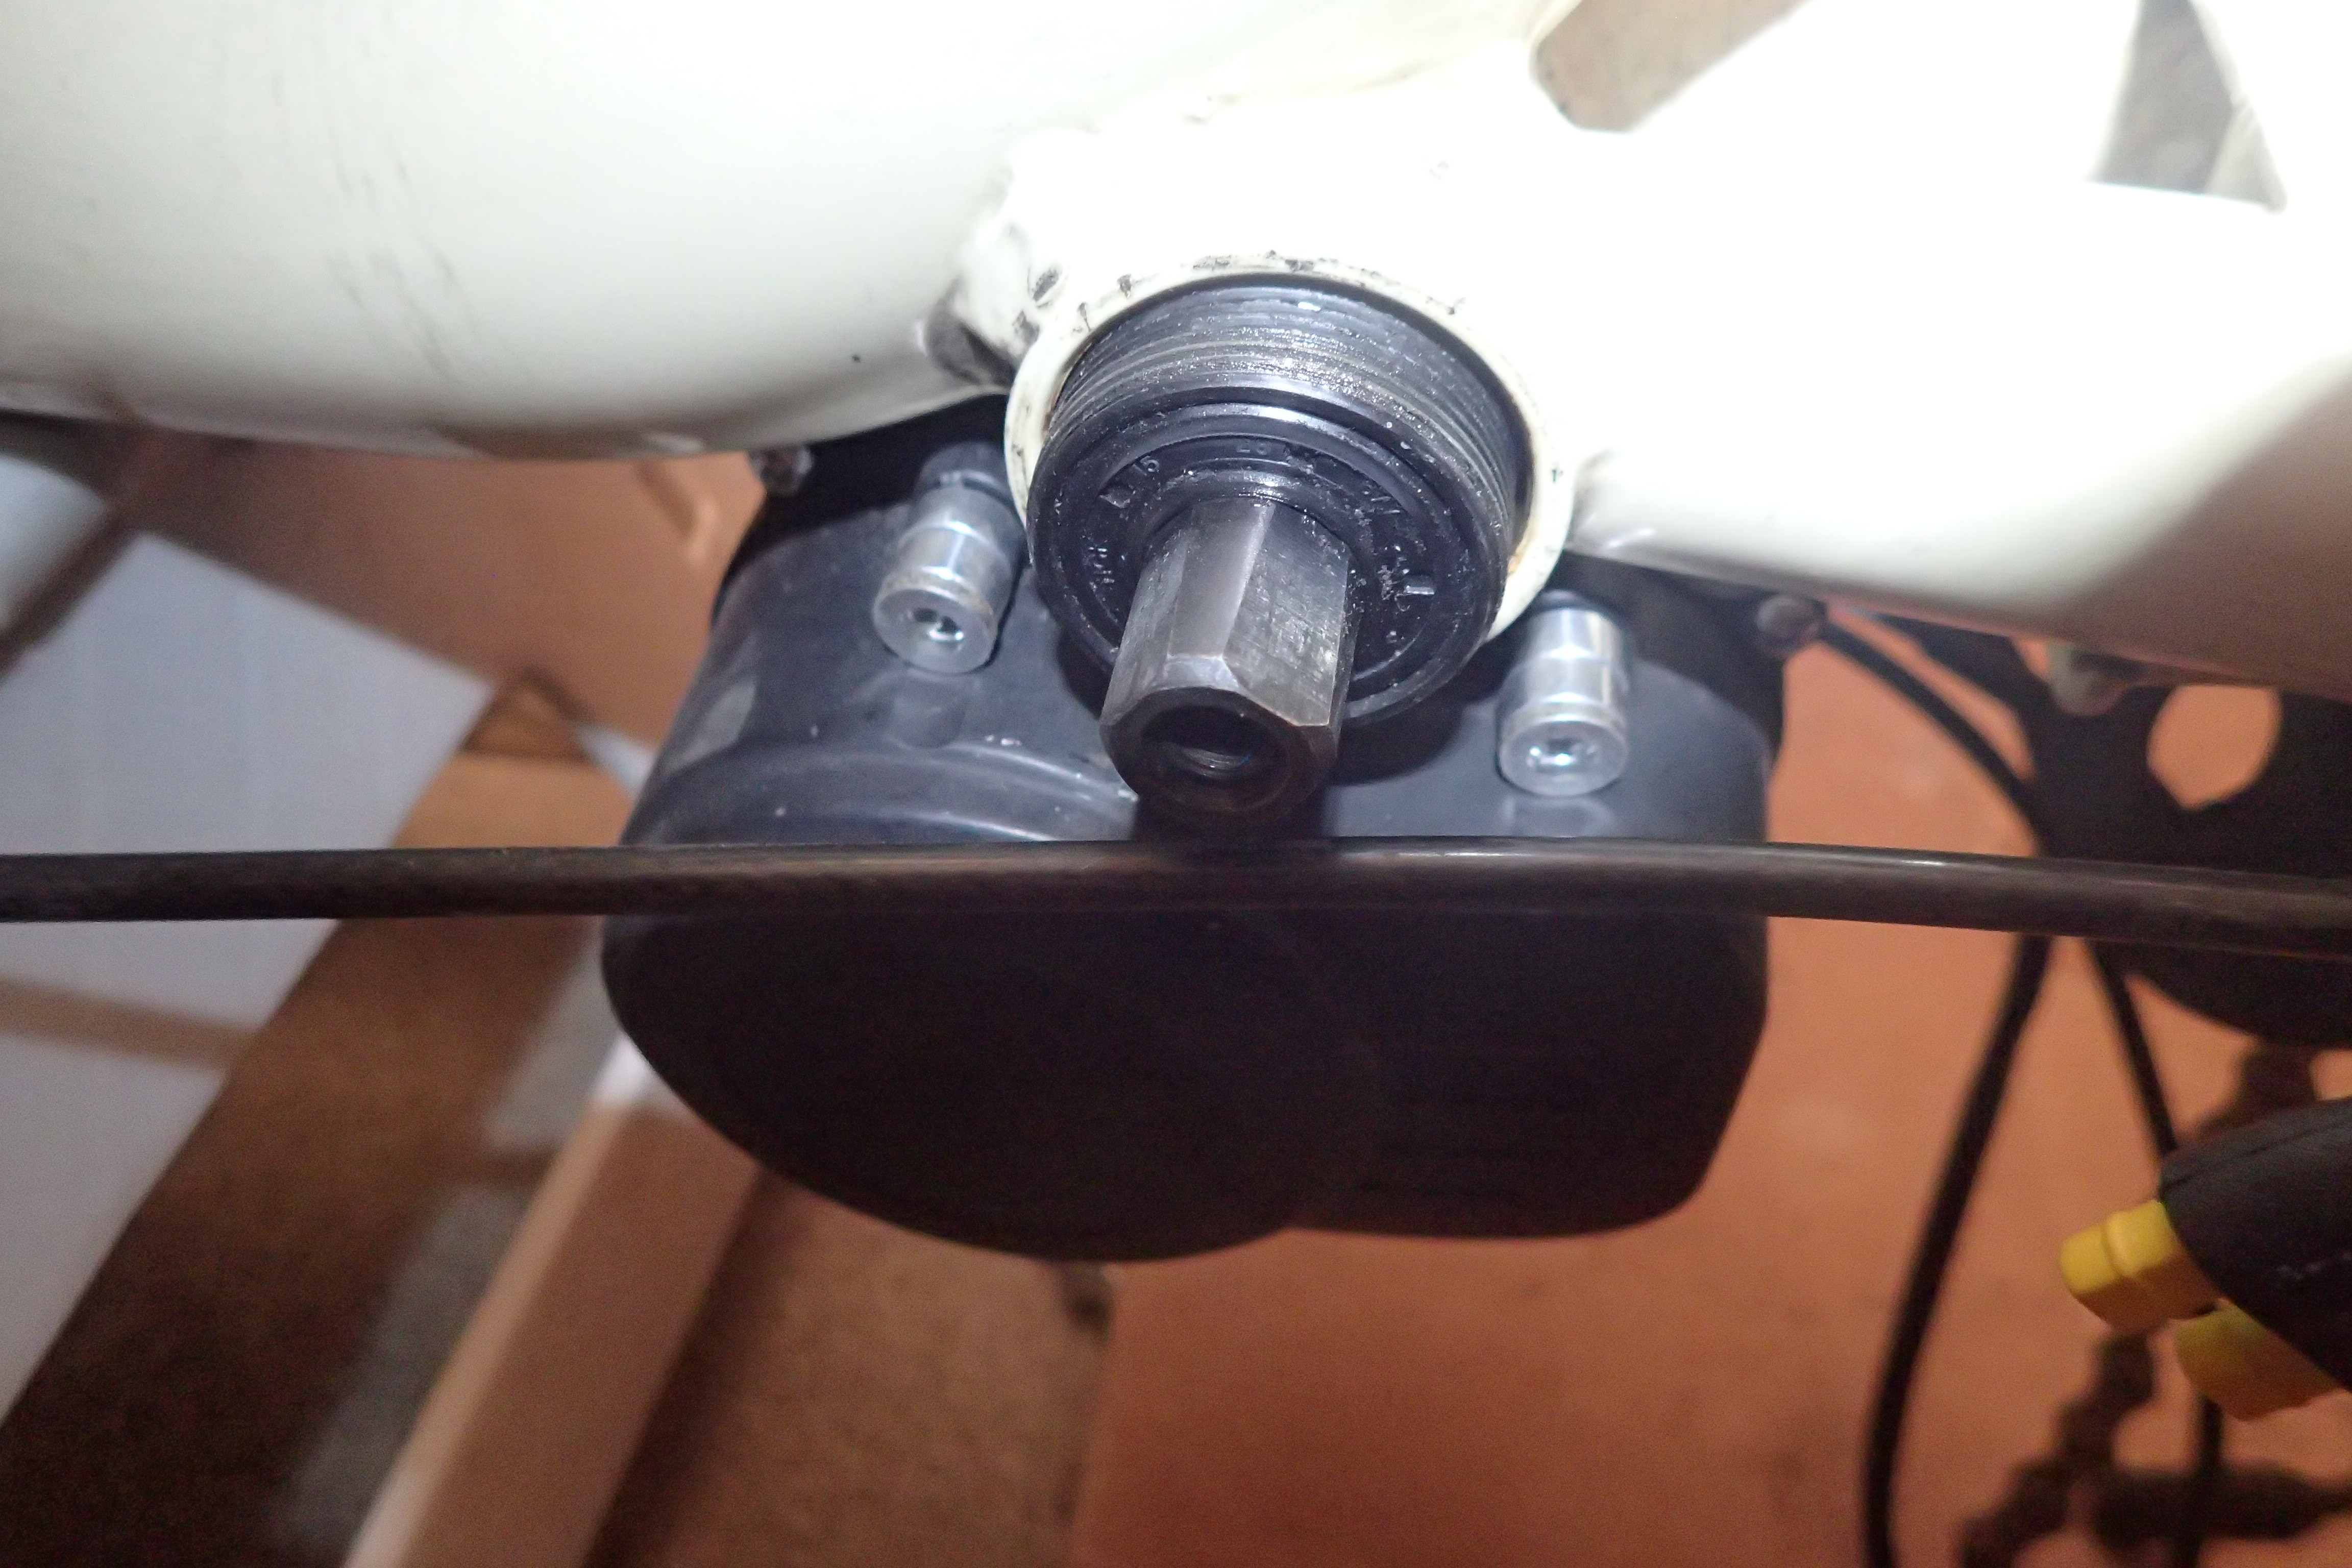
I proceeded to install the motor on the bike. For this you will need to pull the cranks (using a crank-puller tool) and then unscrew the bottom bracket (using a bottom bracket socket). Note that the bottom bracket has reverse threads on the left side. Once the bottom bracket is out, the motor can be slotted in which reveals that part of the motor touches the chainstay.
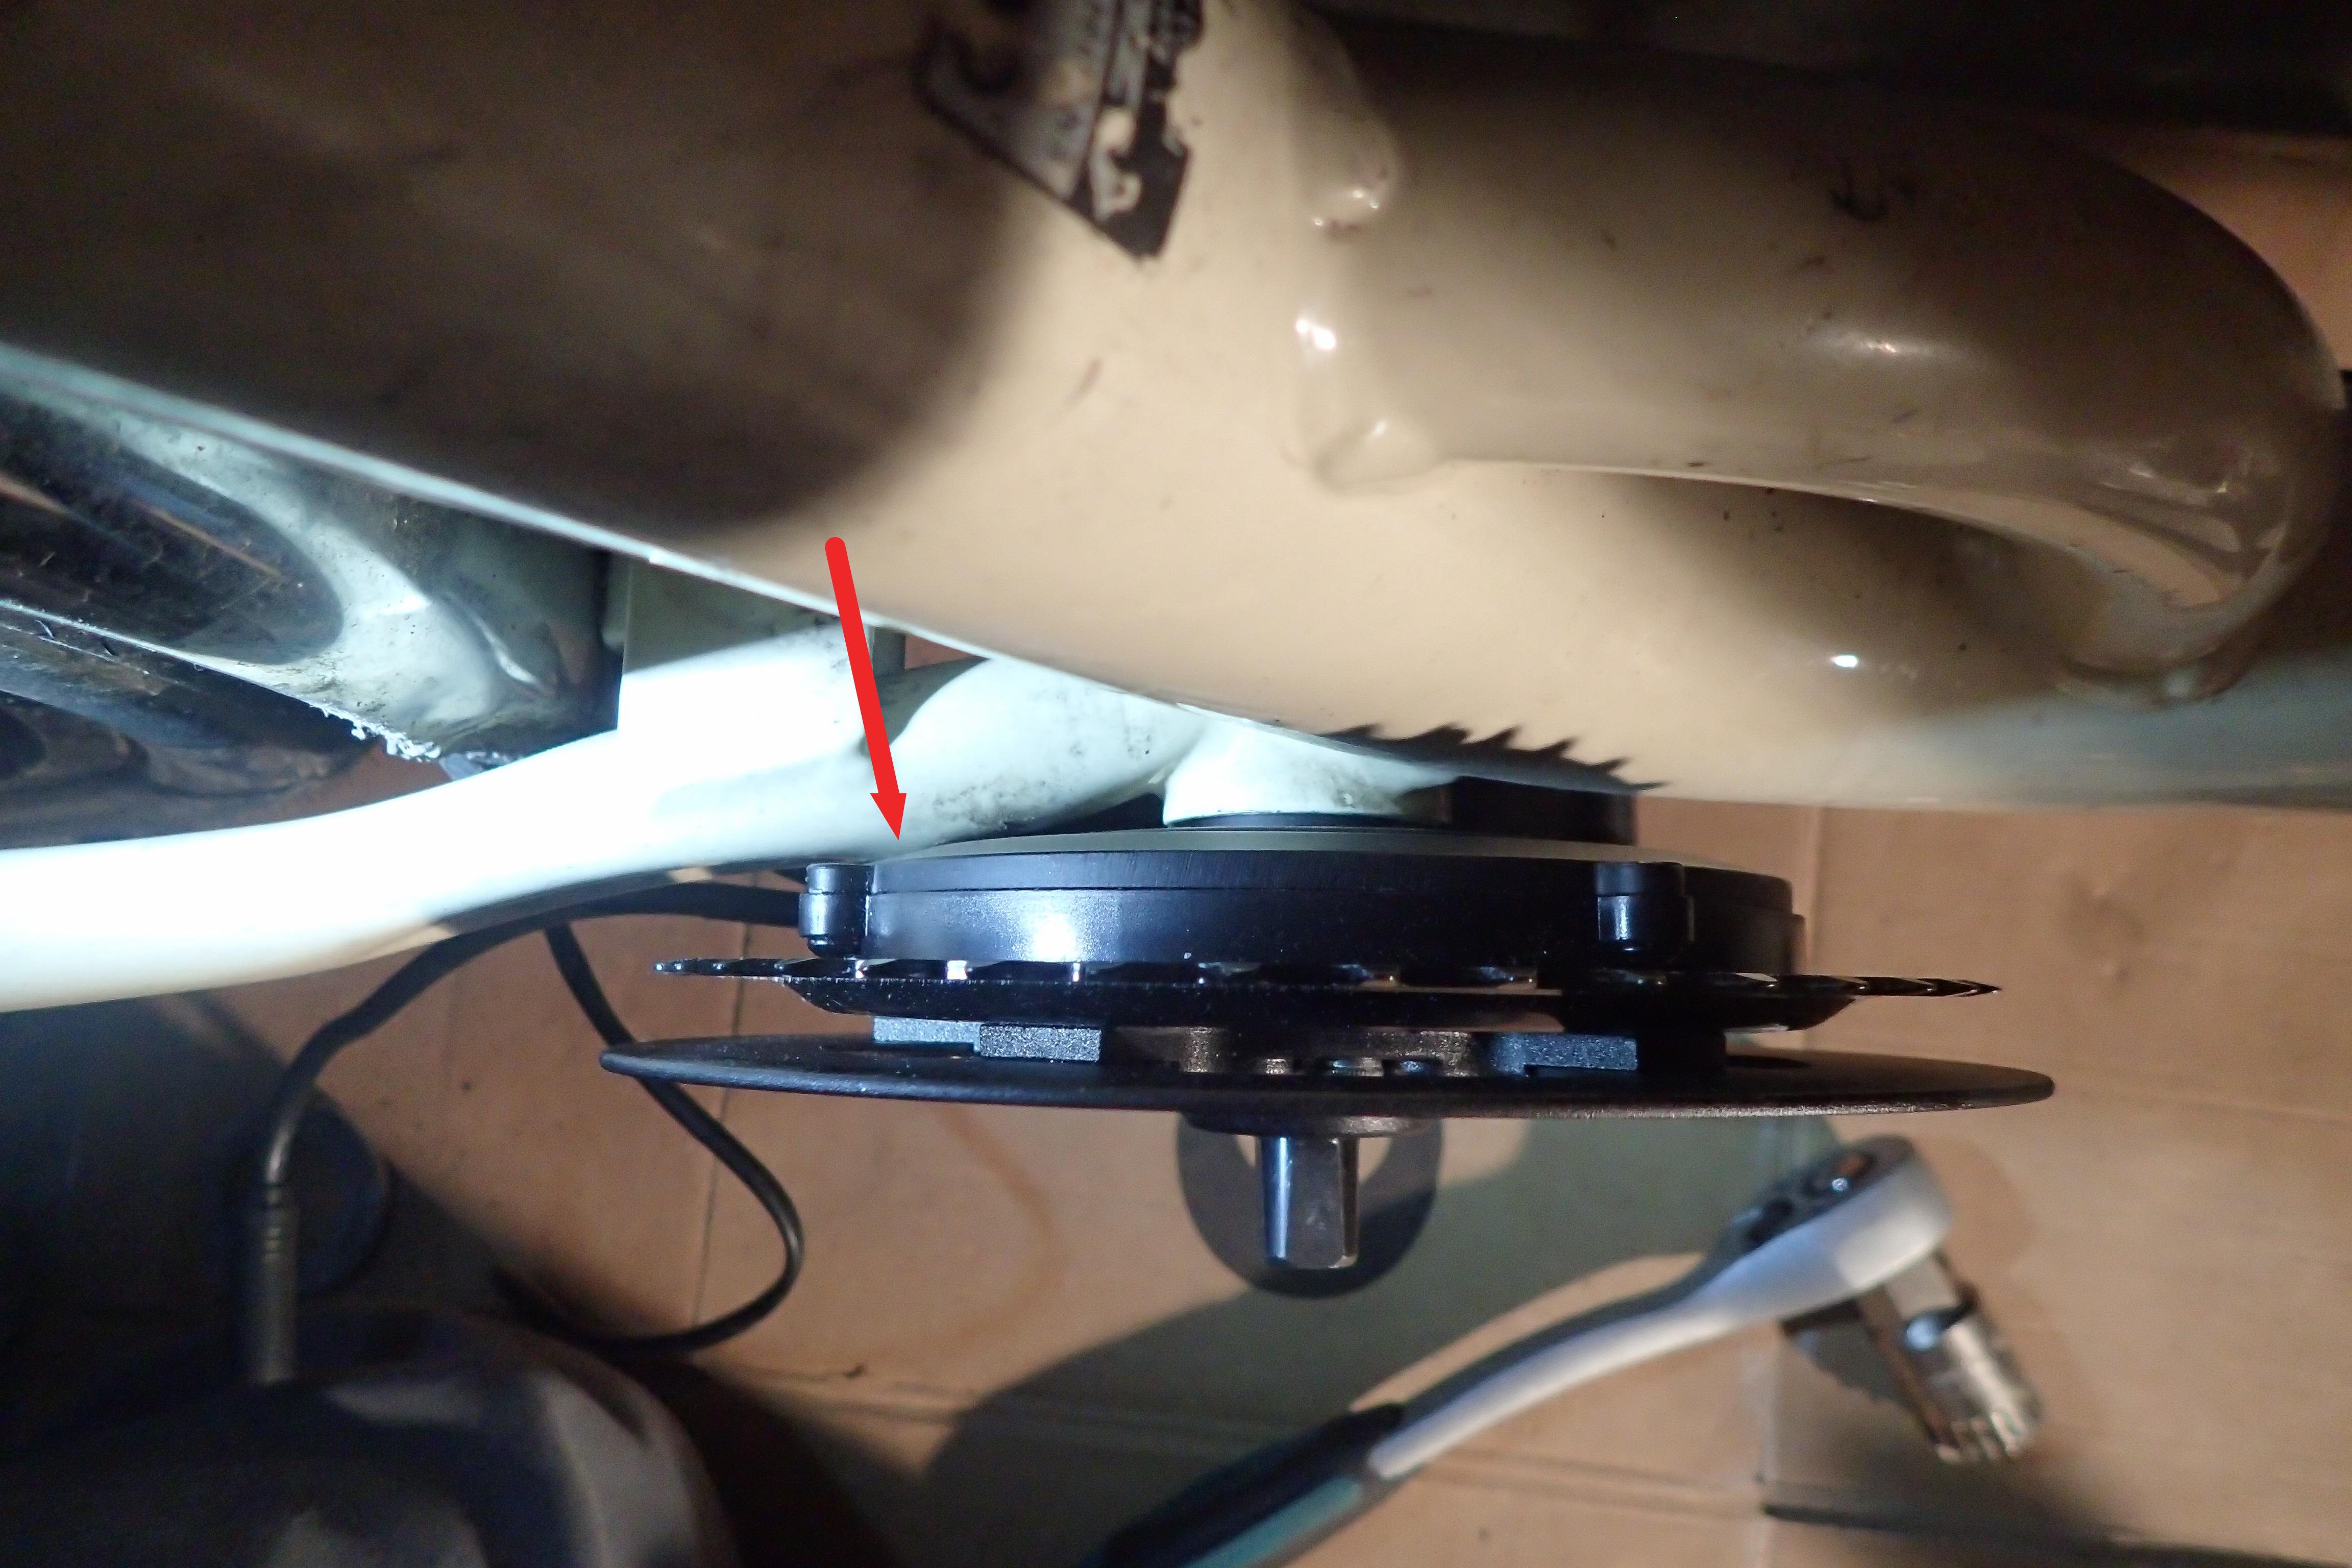 The space problem: the motor casing next to the chainring touches the
chainstay
The space problem: the motor casing next to the chainring touches the
chainstay
This seems to be a fairly common problem, for instance pswpower.com writes: "If mechanical collisions happened between motor and frame, Add gaskets, We will send extra 1pcs 42*35*1.0 and 1pcs 42*35*1.5 gaskets. If you do not add gaskets, It is easy crack the shell and destroy torque sensor." Although those washers will not be thick enough as a washer of 5.5mm to 6.5mm thickness is needed. (Note: the updated version of the TSDZ2, which came out sometime 2020, only needs about a 2mm thick washer. Thus is pswpower.com offering might well work.)
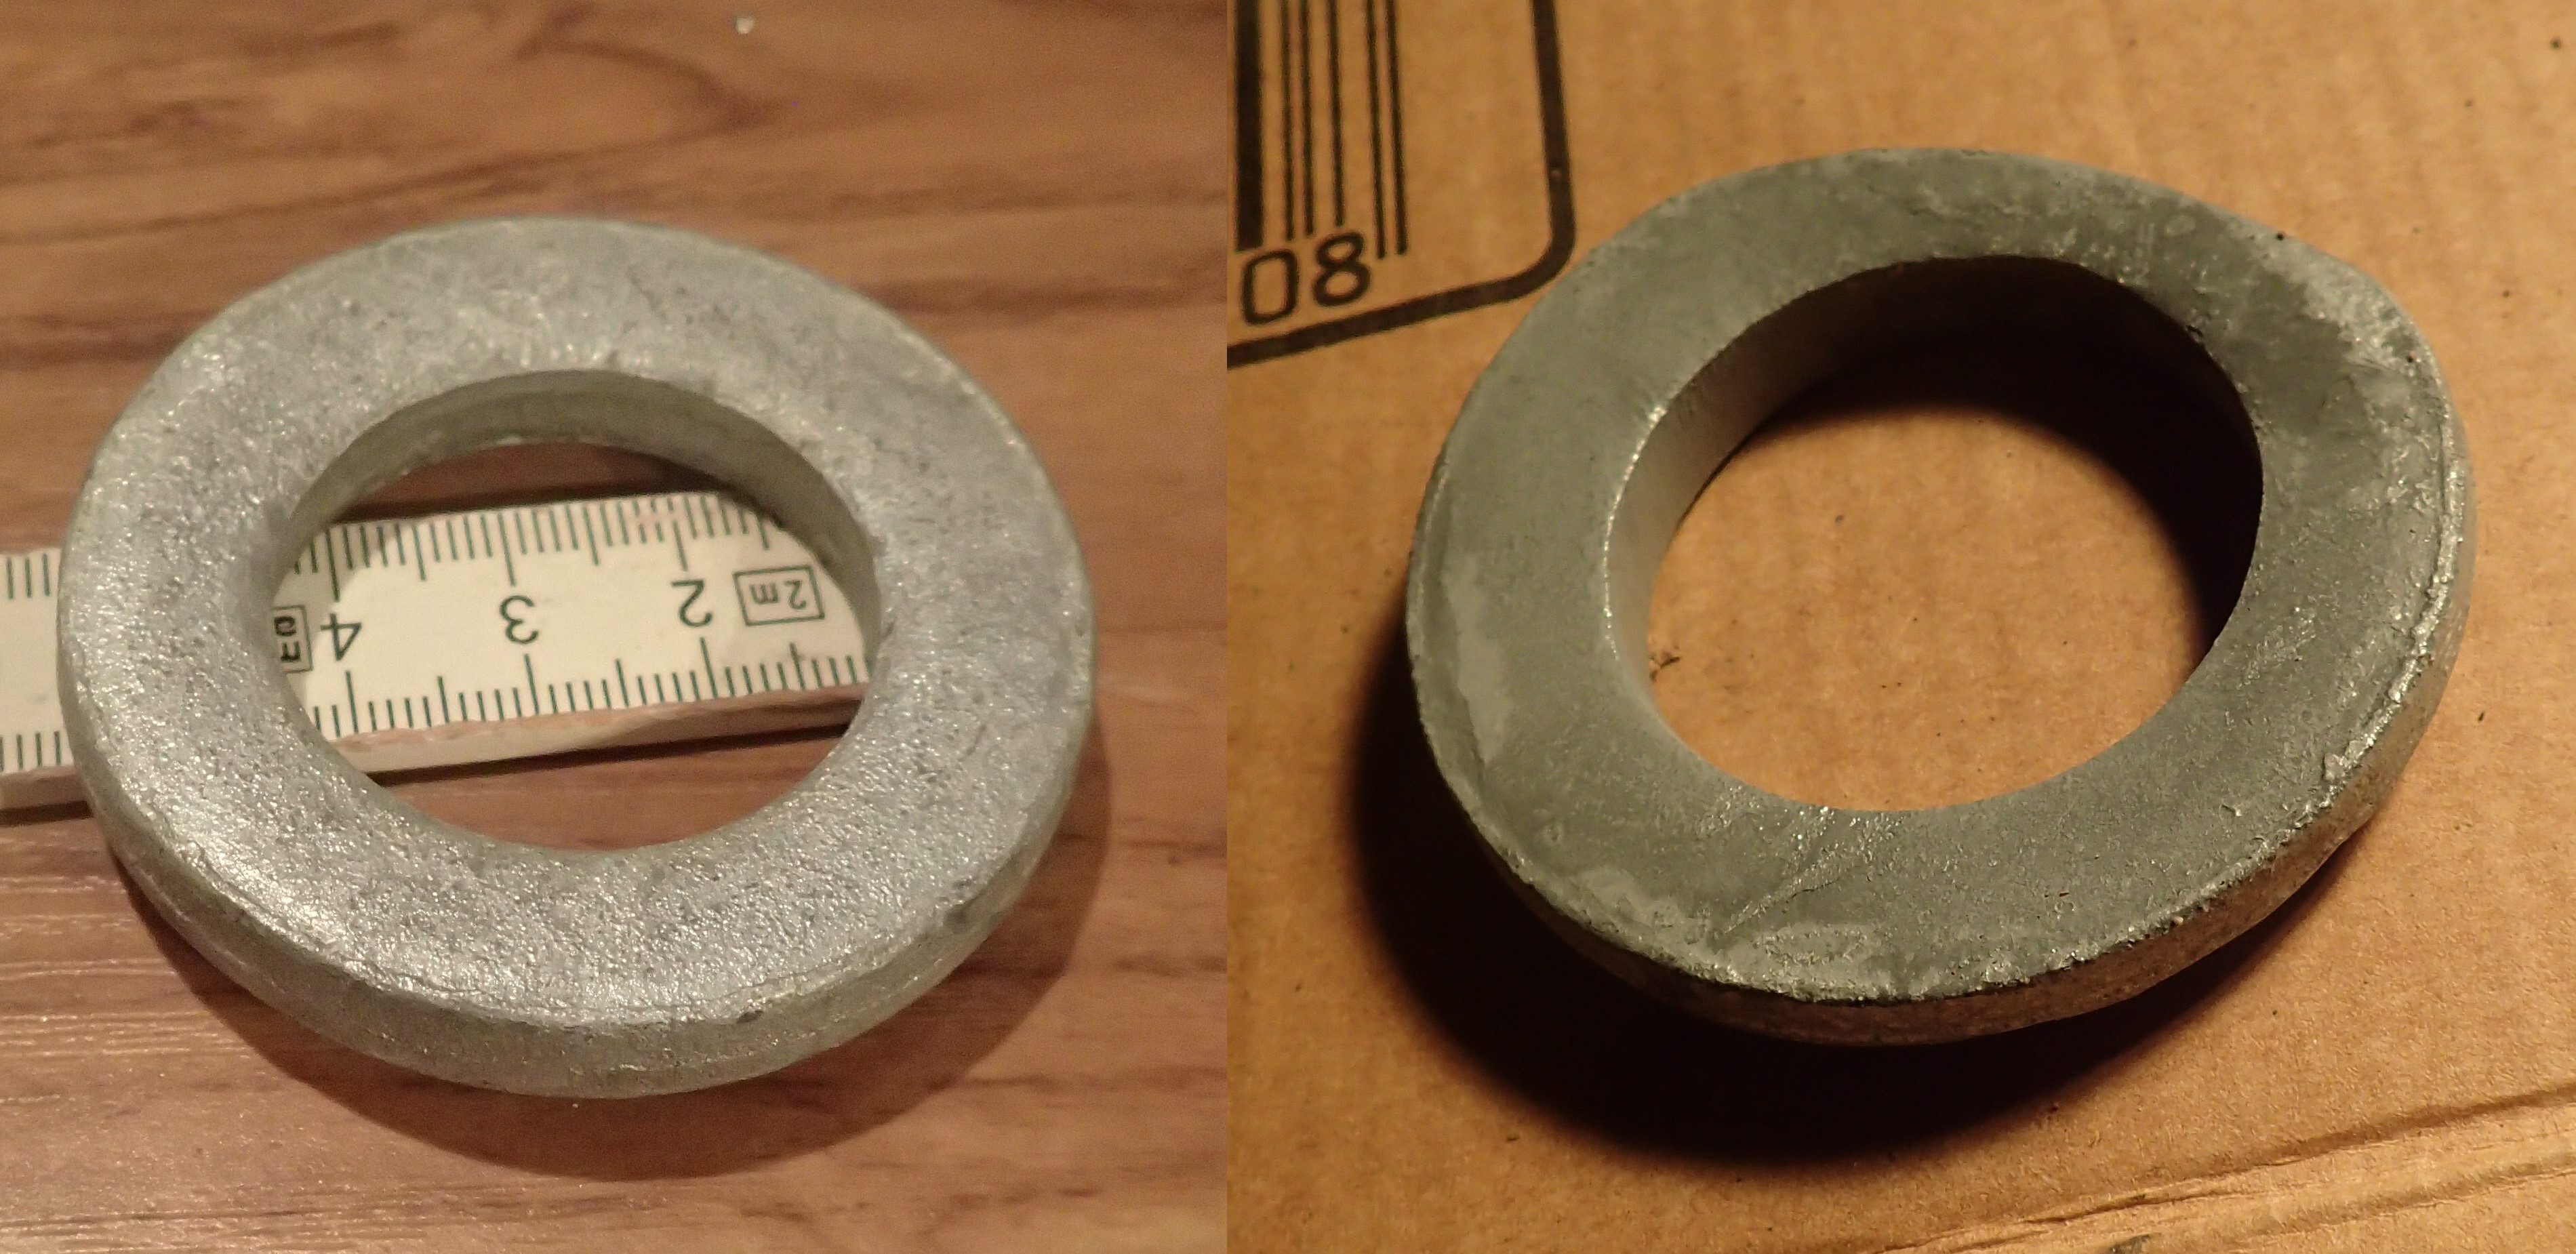 Washer before and after re-working it. I coated it with zink spray.
I did managed to source a washer of almost the right size, but not quite. and it took me about half a day to grind and file it to the right size (using a angle grinder and hand-tool file). I wish I had invested some more time in sourcing a properly sized washer, next time…
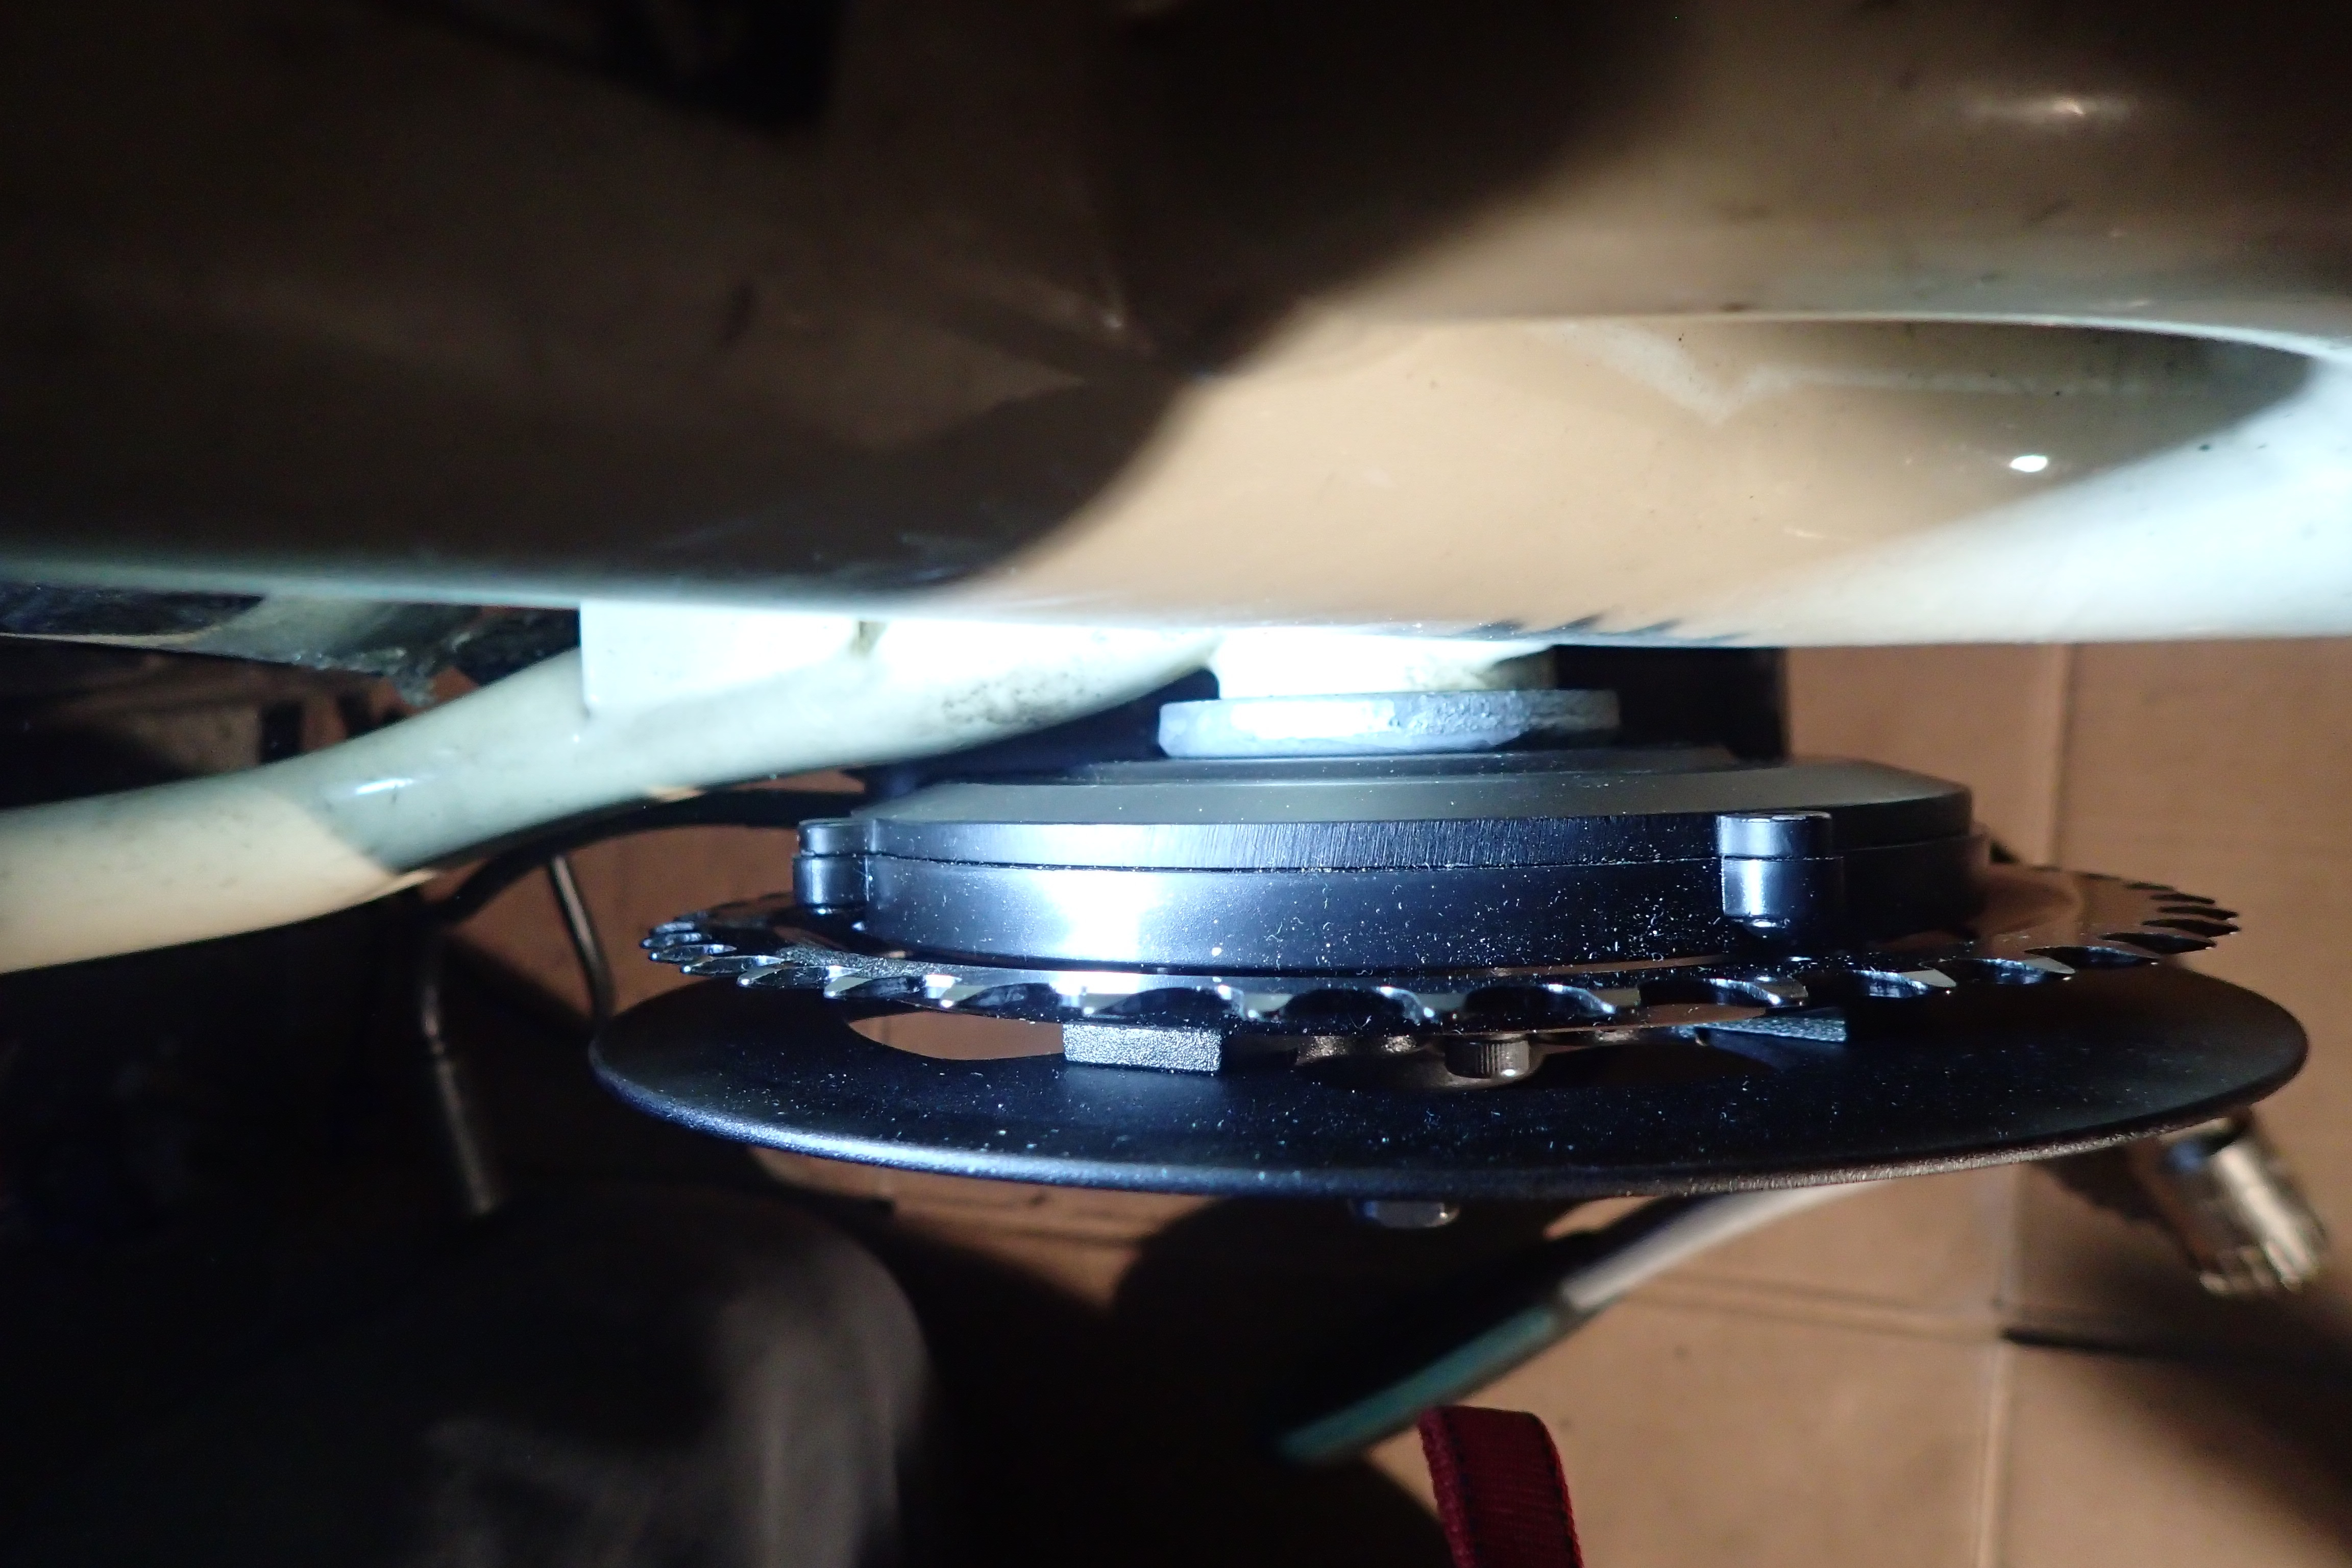 The fixed space problem: note the gap between motor casing and the chainring
What you want is a washer with inner diameter 33.3mm (up to about 34mm should be ok, but snugger is better), outer diameter maximum 46mm, and thickness 5.5mm to 6.5mm. Note that the bottom bracket width of the Bakfiets is 68mm, together with the washer this makes about 74mm. The TSDZ2 is made for bottom brackets 68mm to 73mm. So close enough. My washer is actually a bit thicker but the locknut on the opposite side still screws in far enough, but only just. (Edit : I used Loctite on locknut after it loosened the first time around after a few days of use.)
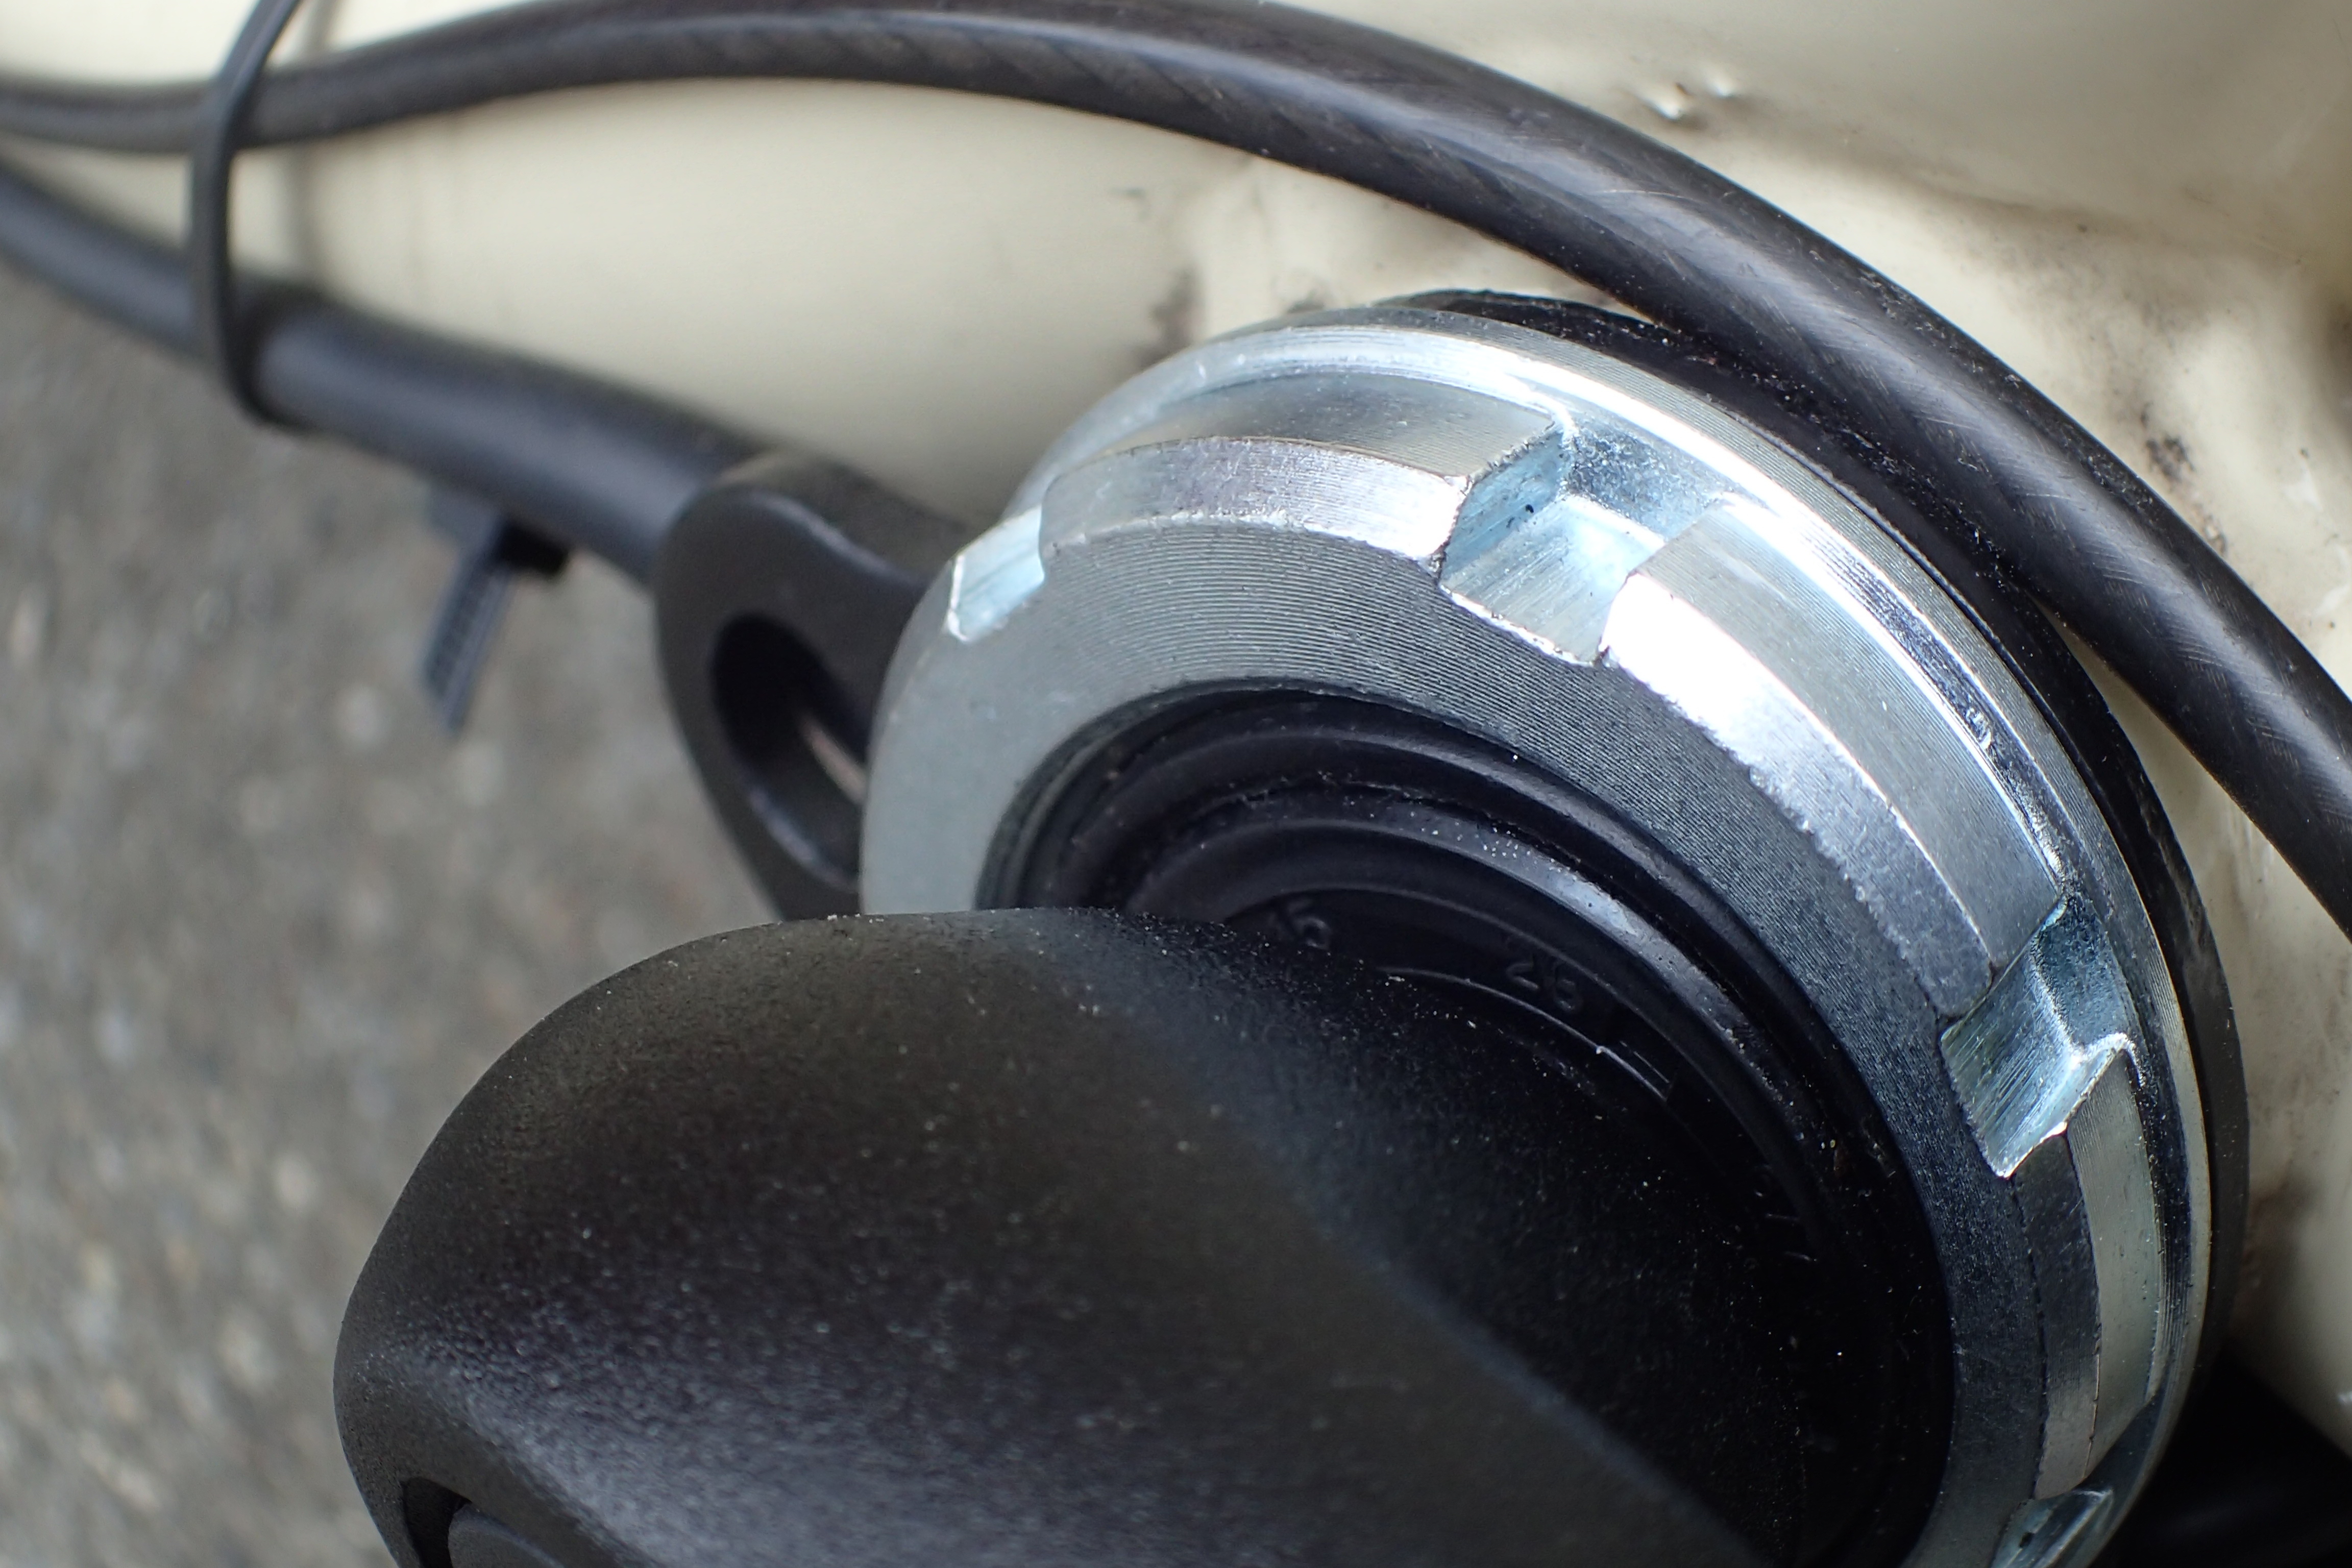 Lock nut threads in just far enough.
The two M5 screws on the left hand side need more washers too, my stack consisted of the two provided ones (to use with 73mm bottom brackets) plus one of about 1mm thickness:
I did not install the "fixing block" (page 7 of the manual), which stops the motor rotating forward. However, as the "downtube" on the cargo bike is actually horizontal, there is nowhere for the motor to rotate as it sits against the frame. (refs 1 & 2)
A minor bad point is that the Q-factor, the distance between the pedals is pretty large with the TSDZ2, and due to the space issue the cranks are also asymmetrical now. However, as this is a sitting only bike, I don't really notice this at all.
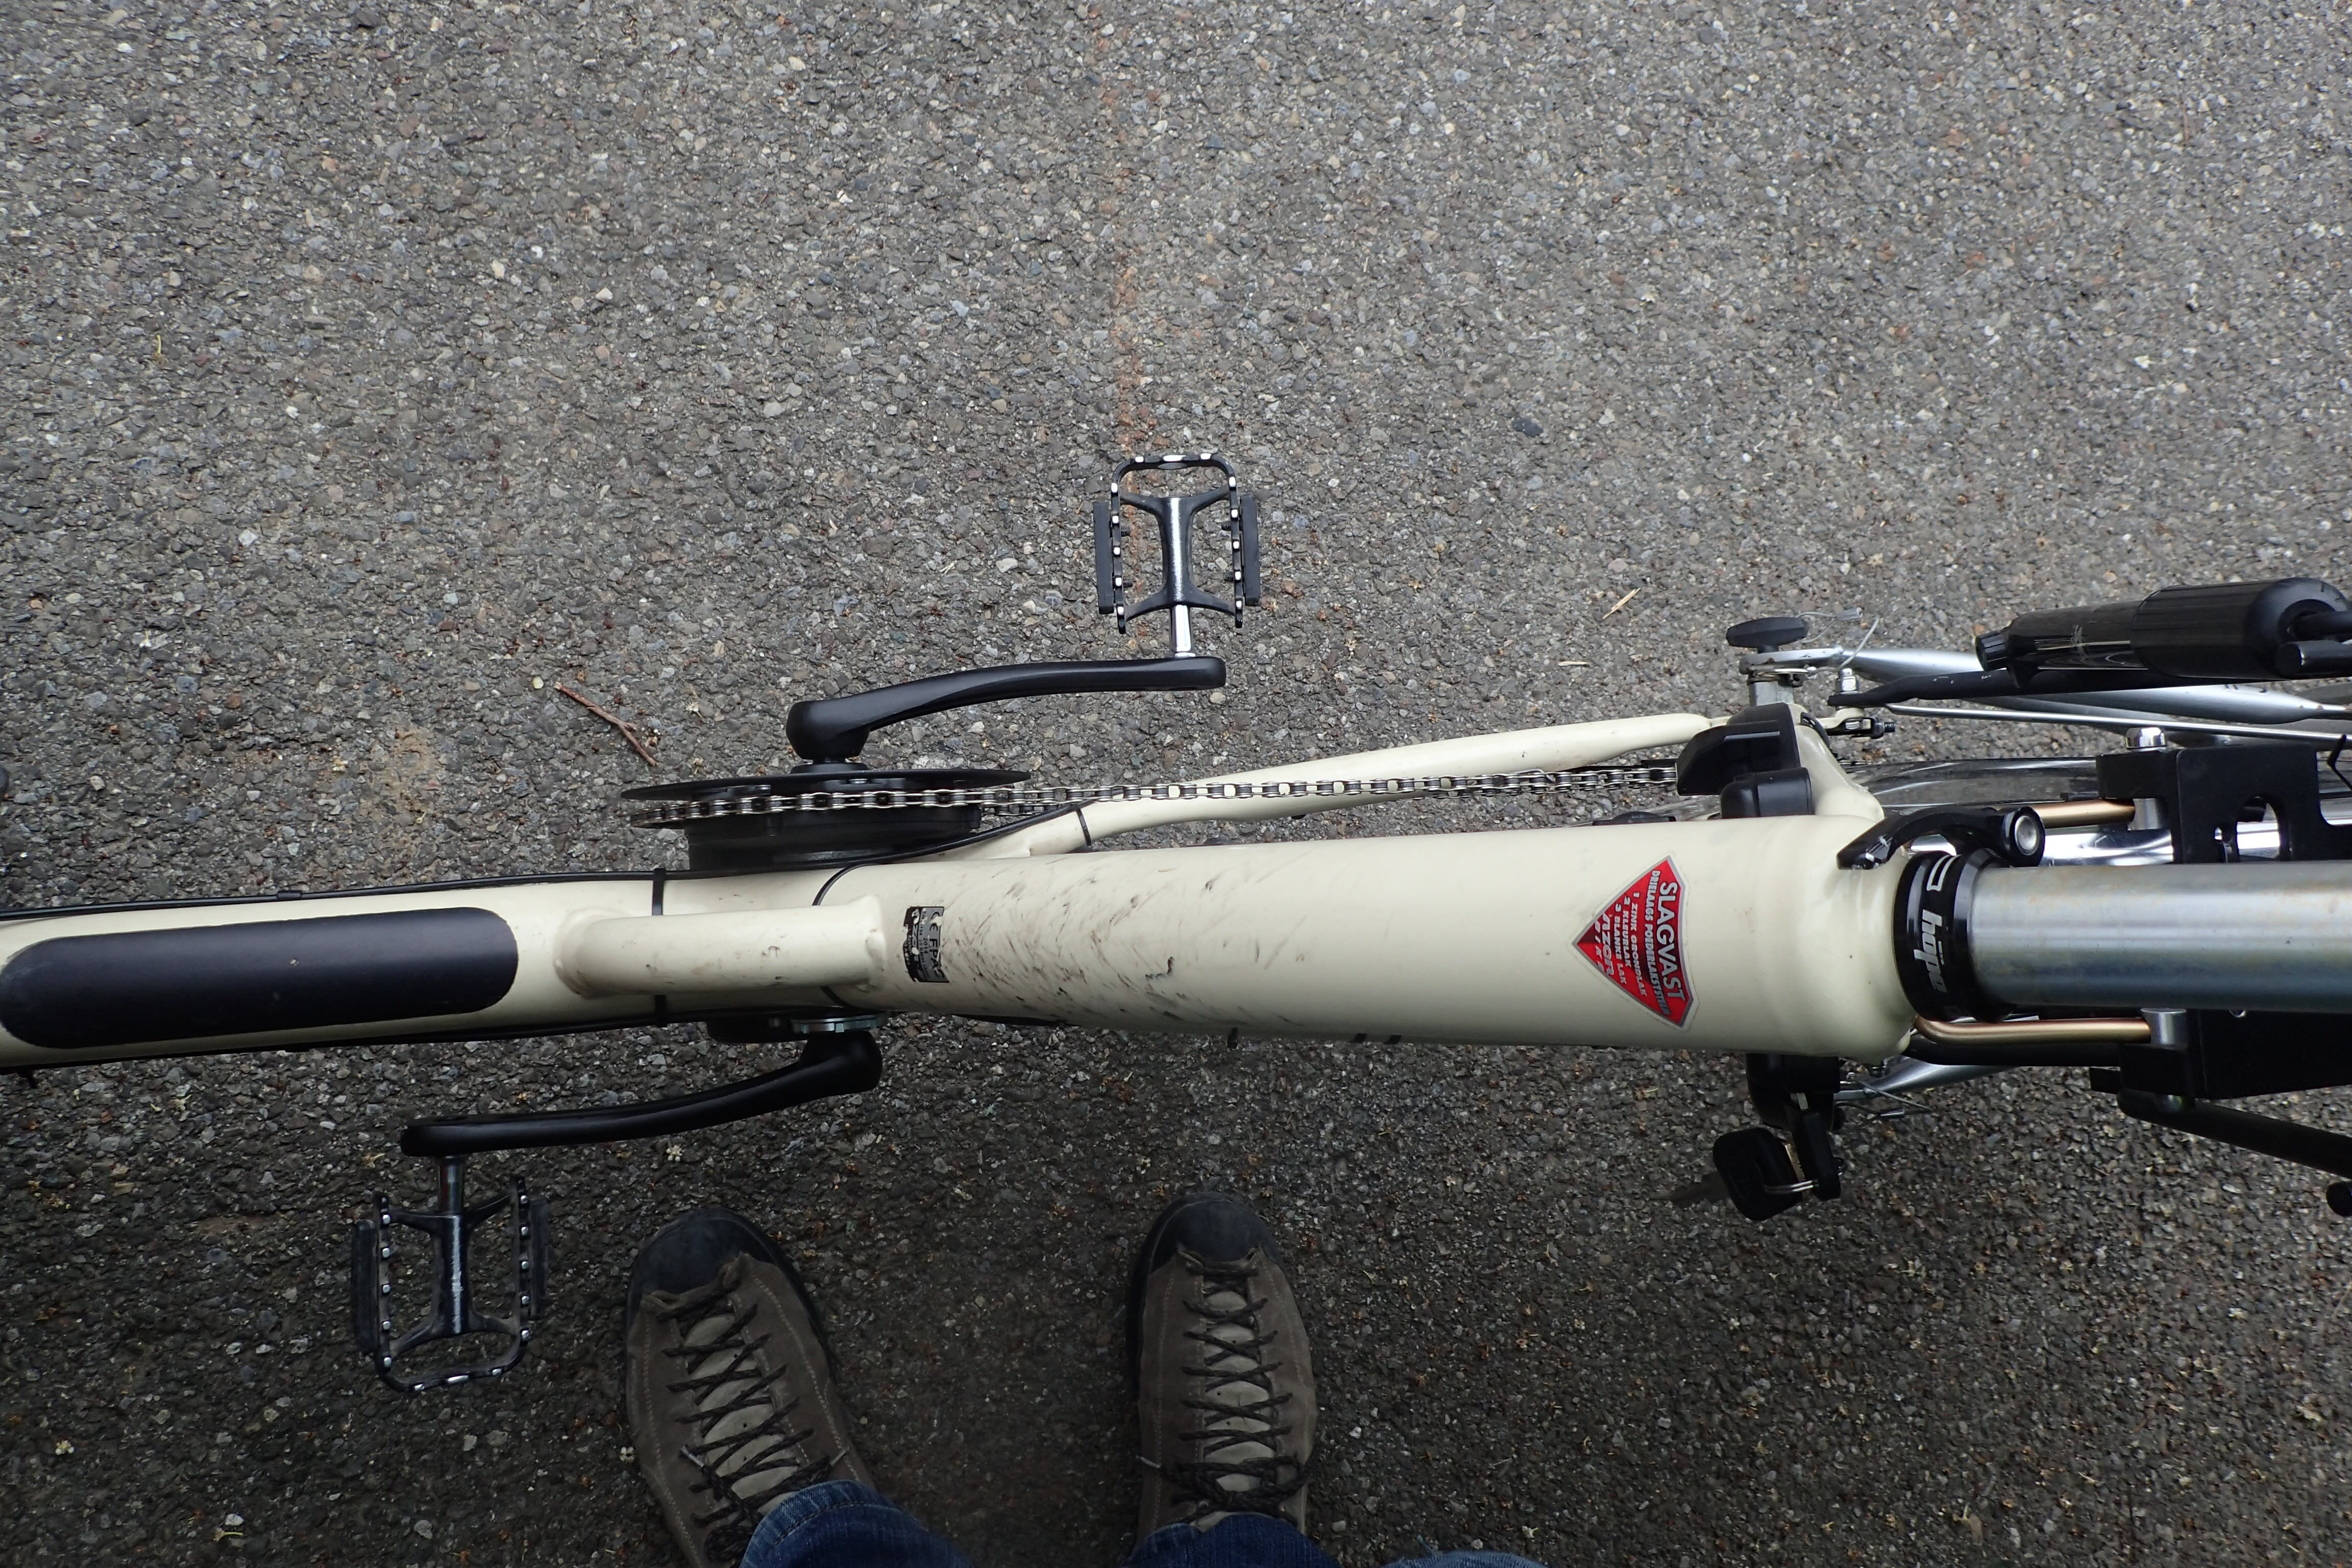
Apparently the Bafang cranks fit and reduce the Q-factor. I'll probably fit one on the right to reduce the asymmetry. Above picture also shows that the chainline is pretty good. (Note that I changed the dishing of the chainring from outward-facing to inward facing to improve the chainline.)
Cable routing and battery installation
I removed all of the cables related to the old motor's installation, except for the front-light cable, which I reused. There is a bit of space between the bottom bracket and the motor which I used to route the front-light cable through and the cable going to the controller. The shifter cable and the rear brake cable I routed just above the bottom bracket.
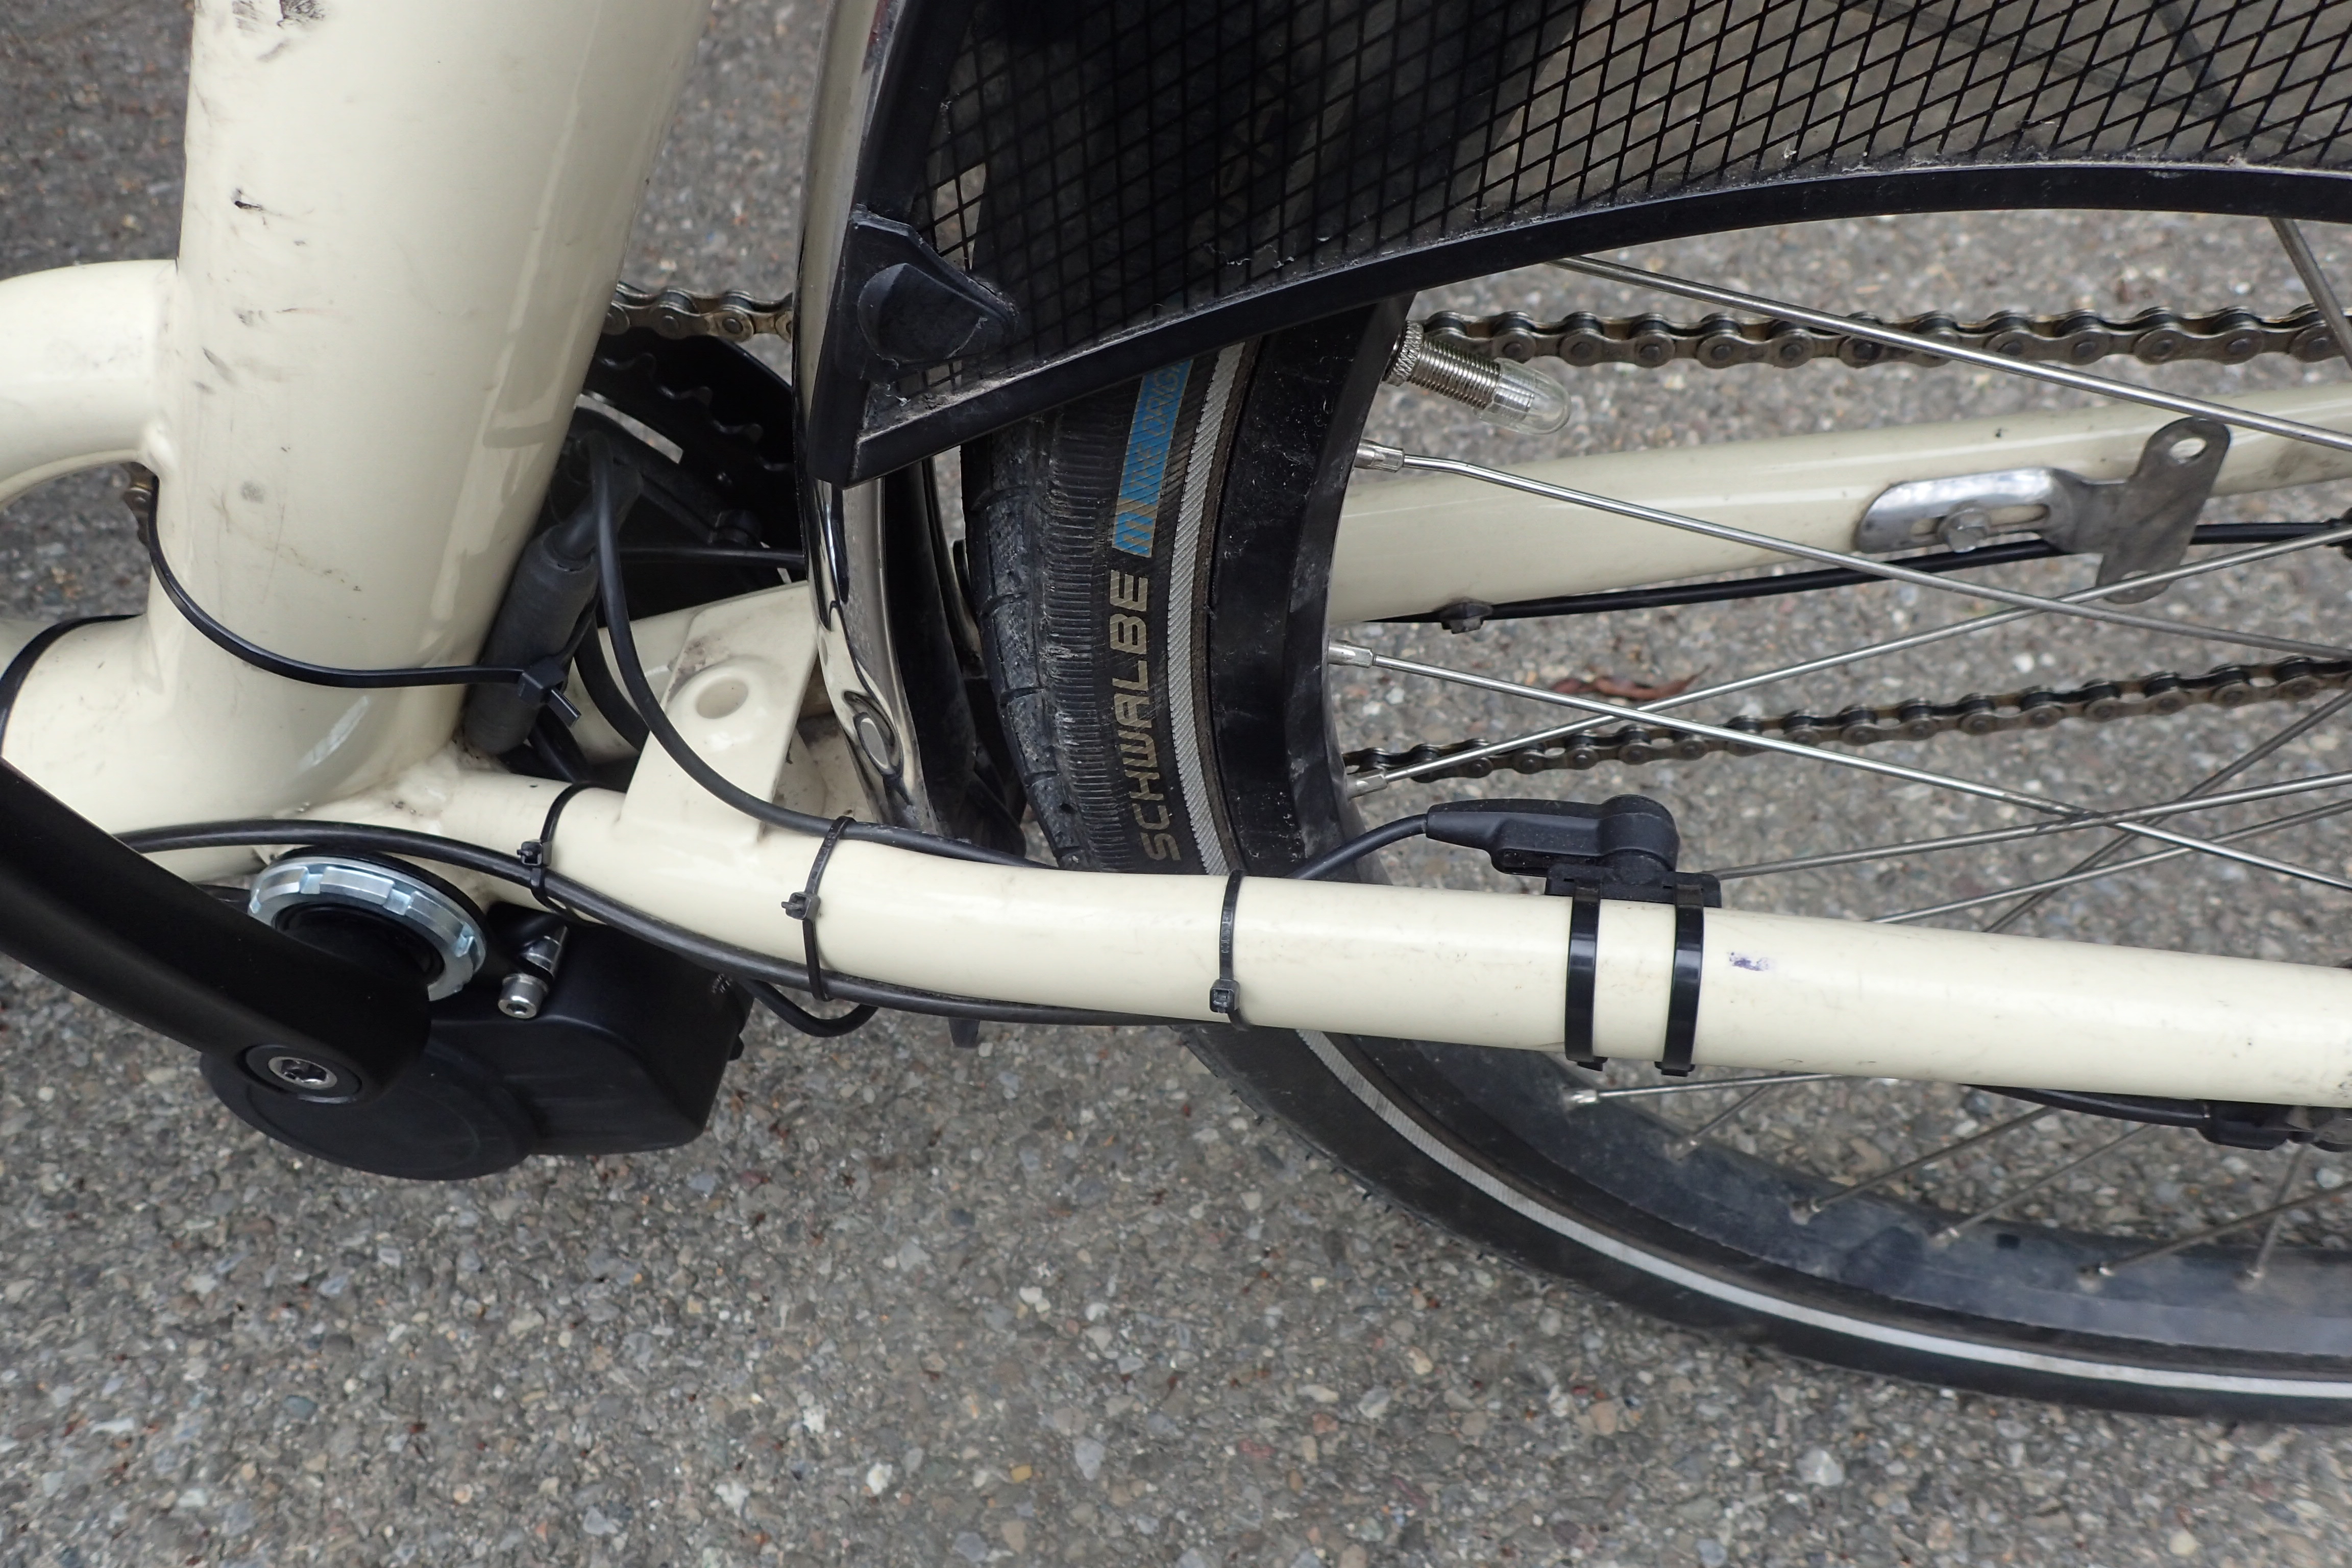
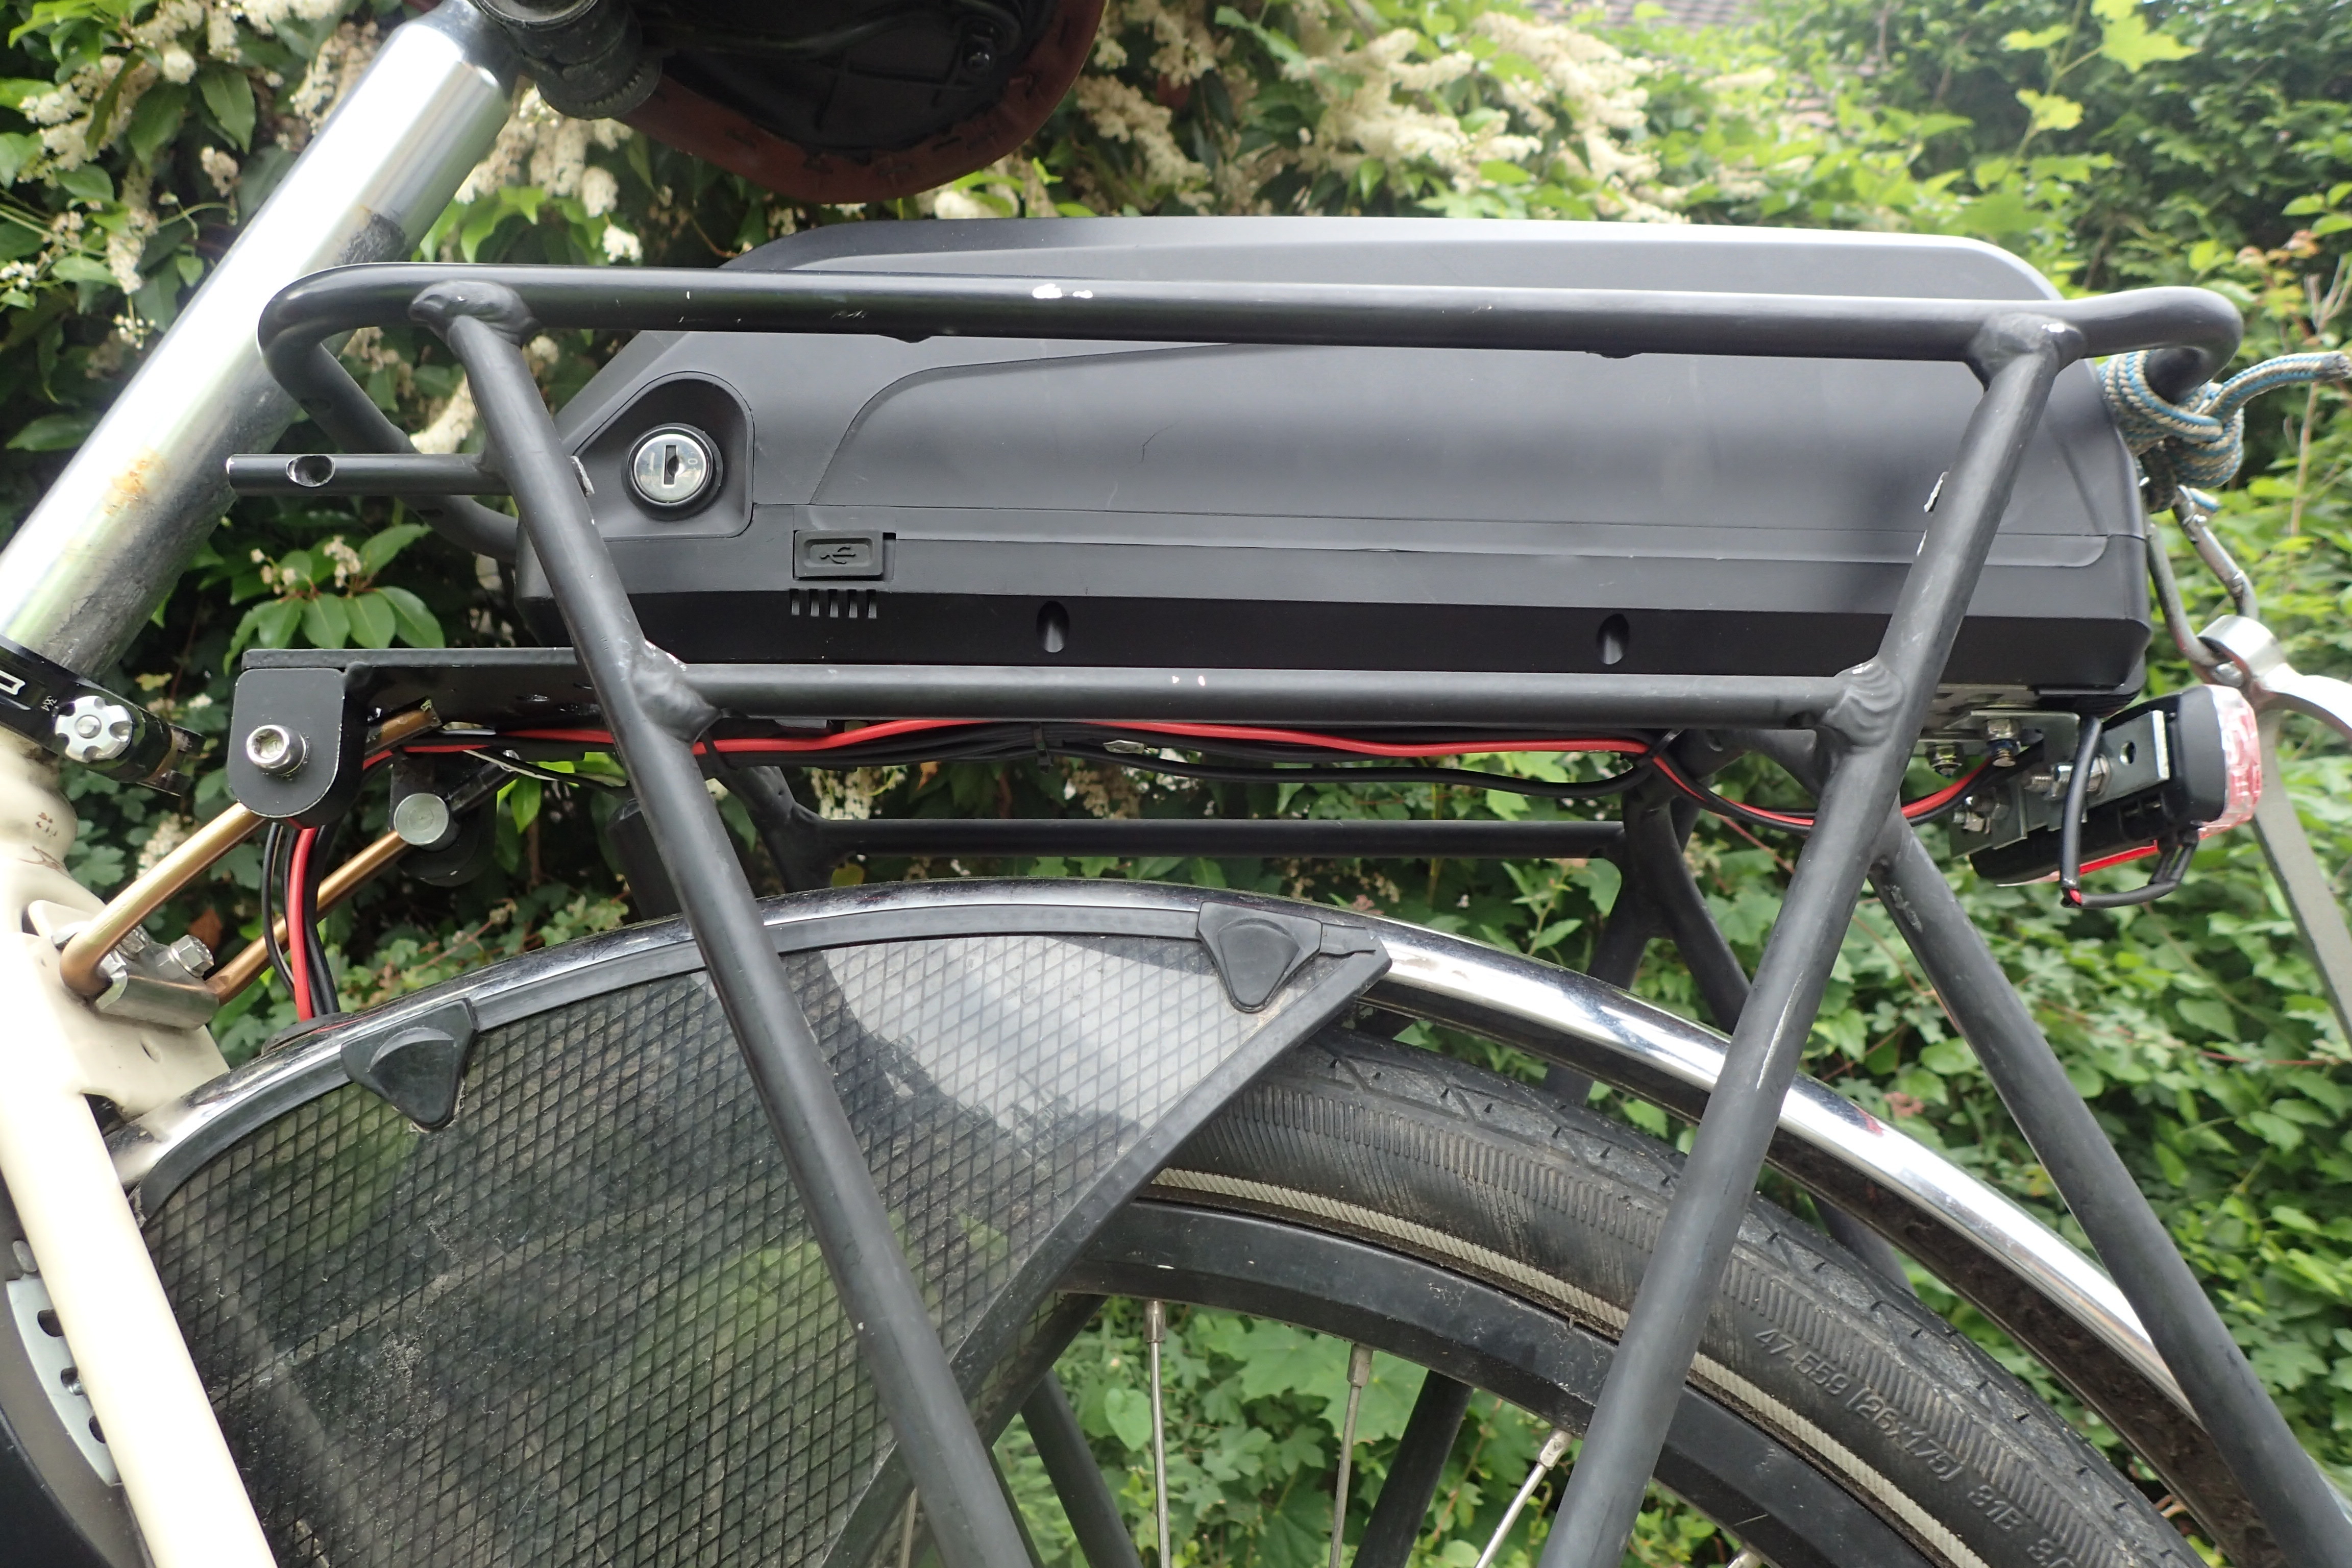
I de-installed the old battery and battery connector which were built into the rear bike-rack. The new battery is a downtube/bottle-holder type battery (48V, 14.5Ah, 700Wh, PXL-HL-48145-SX), however, there is no downtube on the cargo bike (although it easily be installed on the steering tube). After a hint from my significant other, I decided to install the new battery also on the rack, unfortunately it doesn't fit as nicely as the old one but close enough. To reach the rear carrier, I had to extend the power cables a bit. The cables to the battery run inside the mudfender as before.
I reused the headlight and also installed a backlight. The power (at 6V) comes from the battery to which they connect to via a Y-plug going to the speed-sensor. I think the older versions of the TSDZ2 did not have this Y-plug, but it can be retro-fitted. No extra cables are needed by reusing the front light cable.
For the rear brake, I installed the breaklever which stops the motor, for the front brake this was not possible as it is hydraulic. But I don't think it is needed as on the cargo bike I always use both brakes. I didn't install the thumb throttle and I don't think it is needed as the motor starts with pressure on the pedals and thus starting is simple.
The ride
I've only ridden it a few hours thus far, and it feels really nice. I now prefer to take the route over the hill instead of around to go to daycare! It accelerates well and the torque sensor works well and reacts fast. A few minor gripes are that the cut off at 25kmh is very abrupt, which means that the motor turns on and off when riding on the flat. I hear that the open source firmware makes the motor even better and that it should probably fix the two issues.
Update (2020-09-15)
After riding our "new" bike for a bit more than three month and 750km I can confidently say that we really enjoy the ride, the motor works well and is really powerful. We can get up (almost) any hill, fully loaded. The 700Wh battery lasts about 60km, riding mostly at the highest assist level (as Rob on his blog says: "because I don’t want to be the sort of person who has a turbo button available and doesn’t use it"). The wonky Q-factor does not bother us, so, I haven't bothered fixing it. The open source firmware is not installed yet, although, I suspect it would improve the ride a little. But, it is not urgent, as the current firmware is good too. The break lever, which cuts the power to the motor, turned out to be really useful as a clutch: the Shimano Nexus internal gear hub does not shift under load. Turns out that the quickest way to shift is to quickly tab the break which briefly cuts-out the motor.
All in all, I say: tip-top super.
The chainguard (added 2021-07-04)
I finally got around installing a chainguard after a report by Martin, who read and followed my blog-post (yay!), that a Hebie Chainglider works. I went ahead and ordered one, it comes in two parts: the bigger front part, which needs to be sized according to the chainring (probably 42 teeth) and the back-part, which needs to be chosen according to the installed internal gear hub (a Shimano Nexus in my case). I thus ordered parts "350F 42" (front) and "350R D18" (back), see this PDF. To install it, the procedure depends on whether you flipped the dishing of your chainring (as I did) or not. If you flipped it you will need to cut away a bit of the Chainglider's plastic as part of the motor housing is too close to the chainring. The cutout is on the back-half (it comes in two halves) on the lower side.
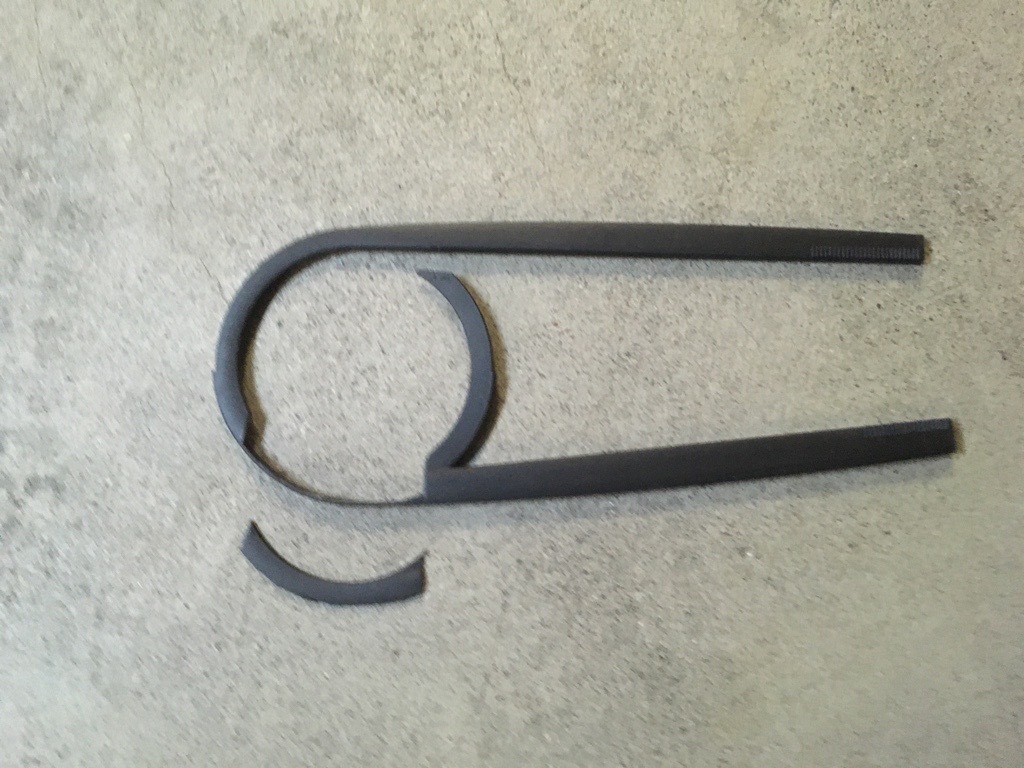 Cutout from the Chainglider
So far I found no indication that the stability of the Chainglider was impacted by this cutout. Once done, it can be installed as the manual says.
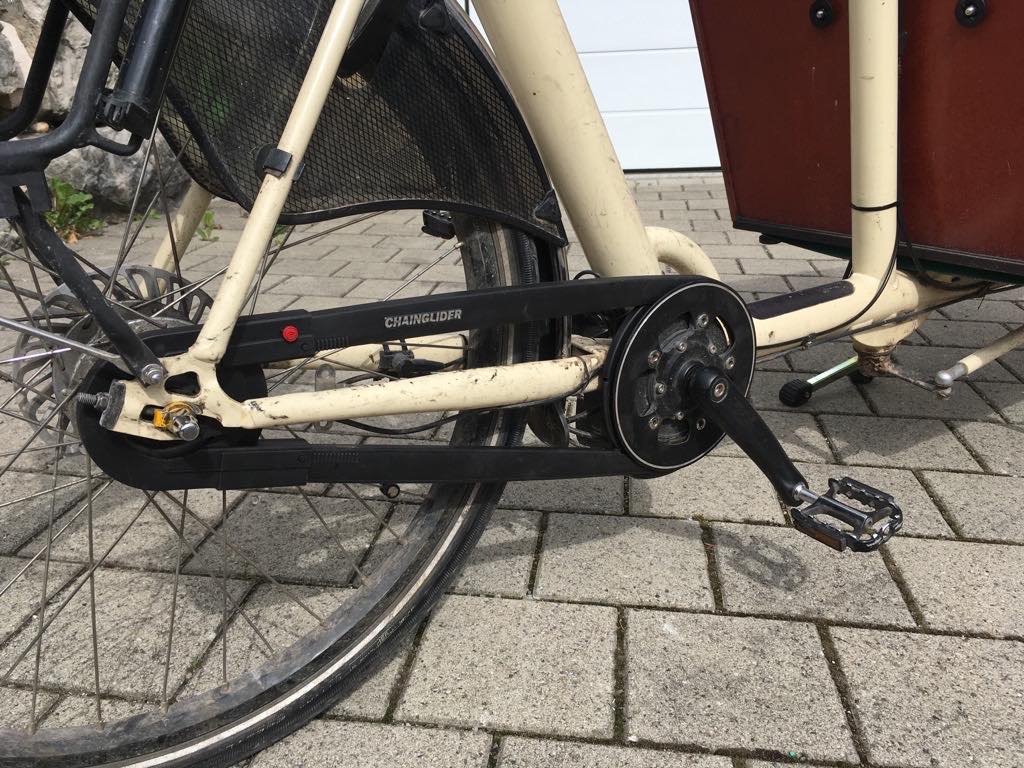 Chainglider on the bike
If you did not flip the chainring, then the space towards the motor is sufficient but not towards the bashguard (if that is what this thing is called). Thus you'll need to remove the bashguard to install the Chainglider, which is fine as you now have the Chainglider. Note that you'll probably need shorter bolts for the chainring.
ToDo
Projects for another weekend:
- Install the open source firmware.
- Install the Bafang crank to make the Q-factor smaller and the cranks more symmetric. (I'll probably give this a miss as I do not notice the asymmetry.)
Tools & material
Tools:
- Allen keys
- wrenches and socket set
- crank puller
- bottom bracket socket
Material:
- TSDZ2 set
- the fat washer
- extra M5 washers for the left side
- heat shrink
- 1m of red and black cable of sufficient diameter
- front and back light 6V
- zip ties
- some screws & nuts to attach the battery
See also the installation manual.
References / Links
- manuals:
- nice review https://ebikechoices.com/tongsheng-tsdz2-review/ with essentially a long FAQ in the comments
- open-source firmware:
- https://github.com/OpenSource-EBike-firmware/TSDZ2_wiki/wiki
- also has other resources, e.g. fixing common defects, installation examples, etc
- fork which works on the stock VLCD5 display
- nice blog posts on installation: 1 & 2
- formus on https://endless-sphere.com/
Comments/questions? Drop me an email!